Apply layouts to rearrange a diagram
Layouts allow you to quickly rearrange the shapes and connectors on the drawing canvas in the draw.io editor. Your diagram is reorganised following the specific rules and spacing information defined by the layout you choose.
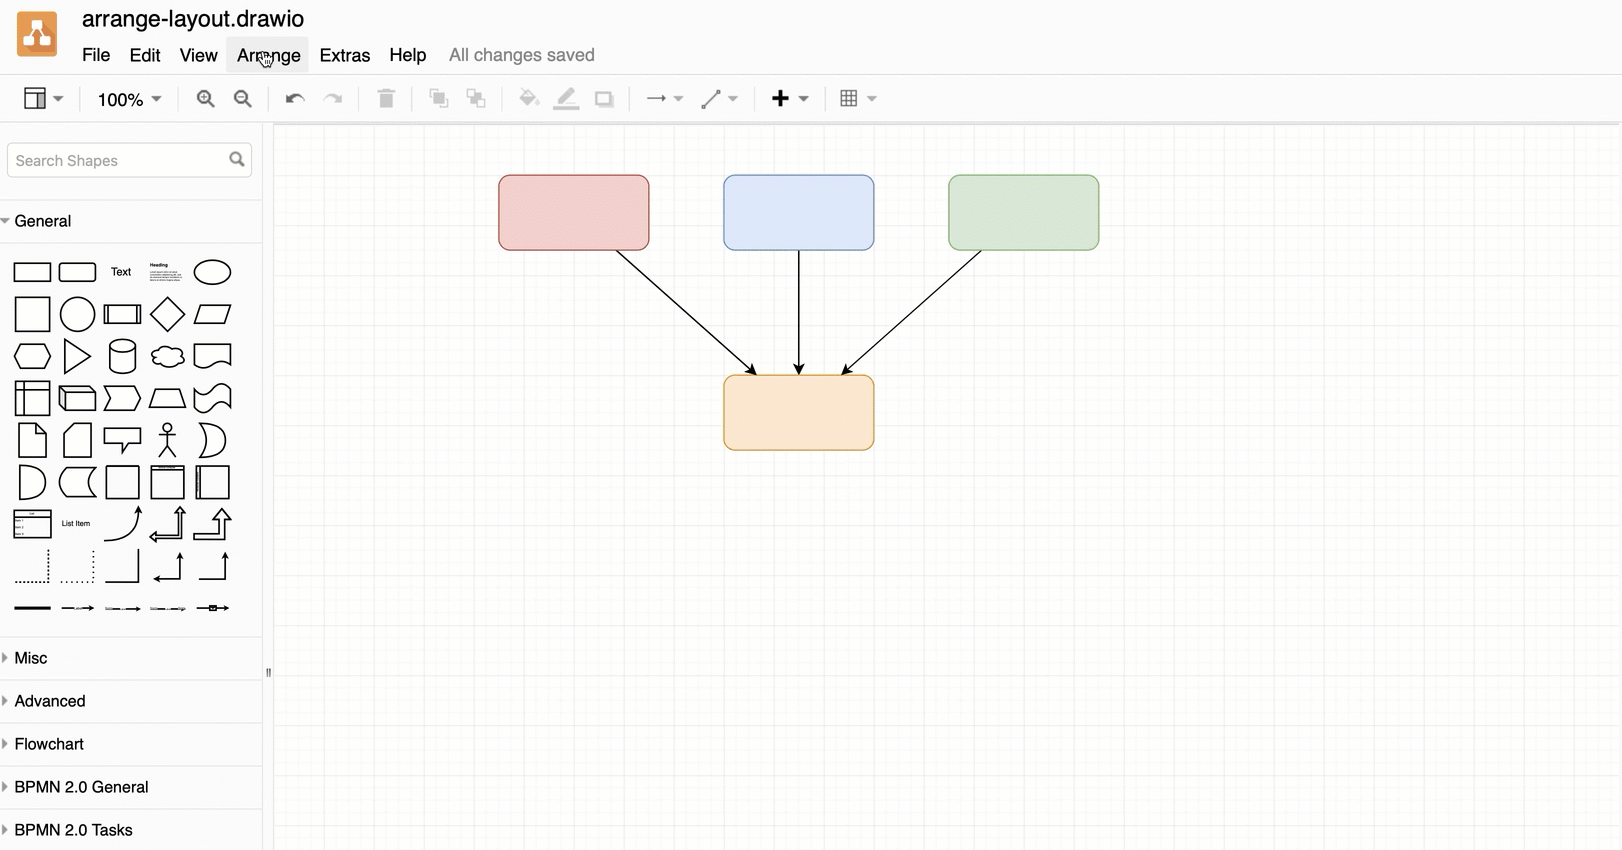
Select Arrange > Layout from the draw.io editor, then select the layout you want to use.

Note: Some of these layouts are quite specific, and will only work for certain diagram types. If you apply a layout that you don’t like, press Ctrl+Z on Windows or Cmd+Z on macOS to undo that change.
Layouts are calculated from your diagram’s current state - applying a layout after you have applied another layout will not result consistently in the same diagram structure.
The following layouts are available. See the sections below for examples where the layout has been applied.
- Flow layouts
- Tree layouts
- Circle layout
- Organic layout
- Org chart layouts
- Parallels layout
- Custom layouts
Tip: You can also build a diagram with a wizard that automatically applies a layout as you build it via Insert > Layout, or use layout shapes to automatically rearrange shapes in a swimlane as you add and connect them.
Flow layouts
Flow layouts work well for visualising processes, mind maps, or any typs of diagram where there is some flow-like structure or movement. For example, using one of the map templates from the template library in draw.io, both the horizontal and vertical flow layouts are clear and readable.
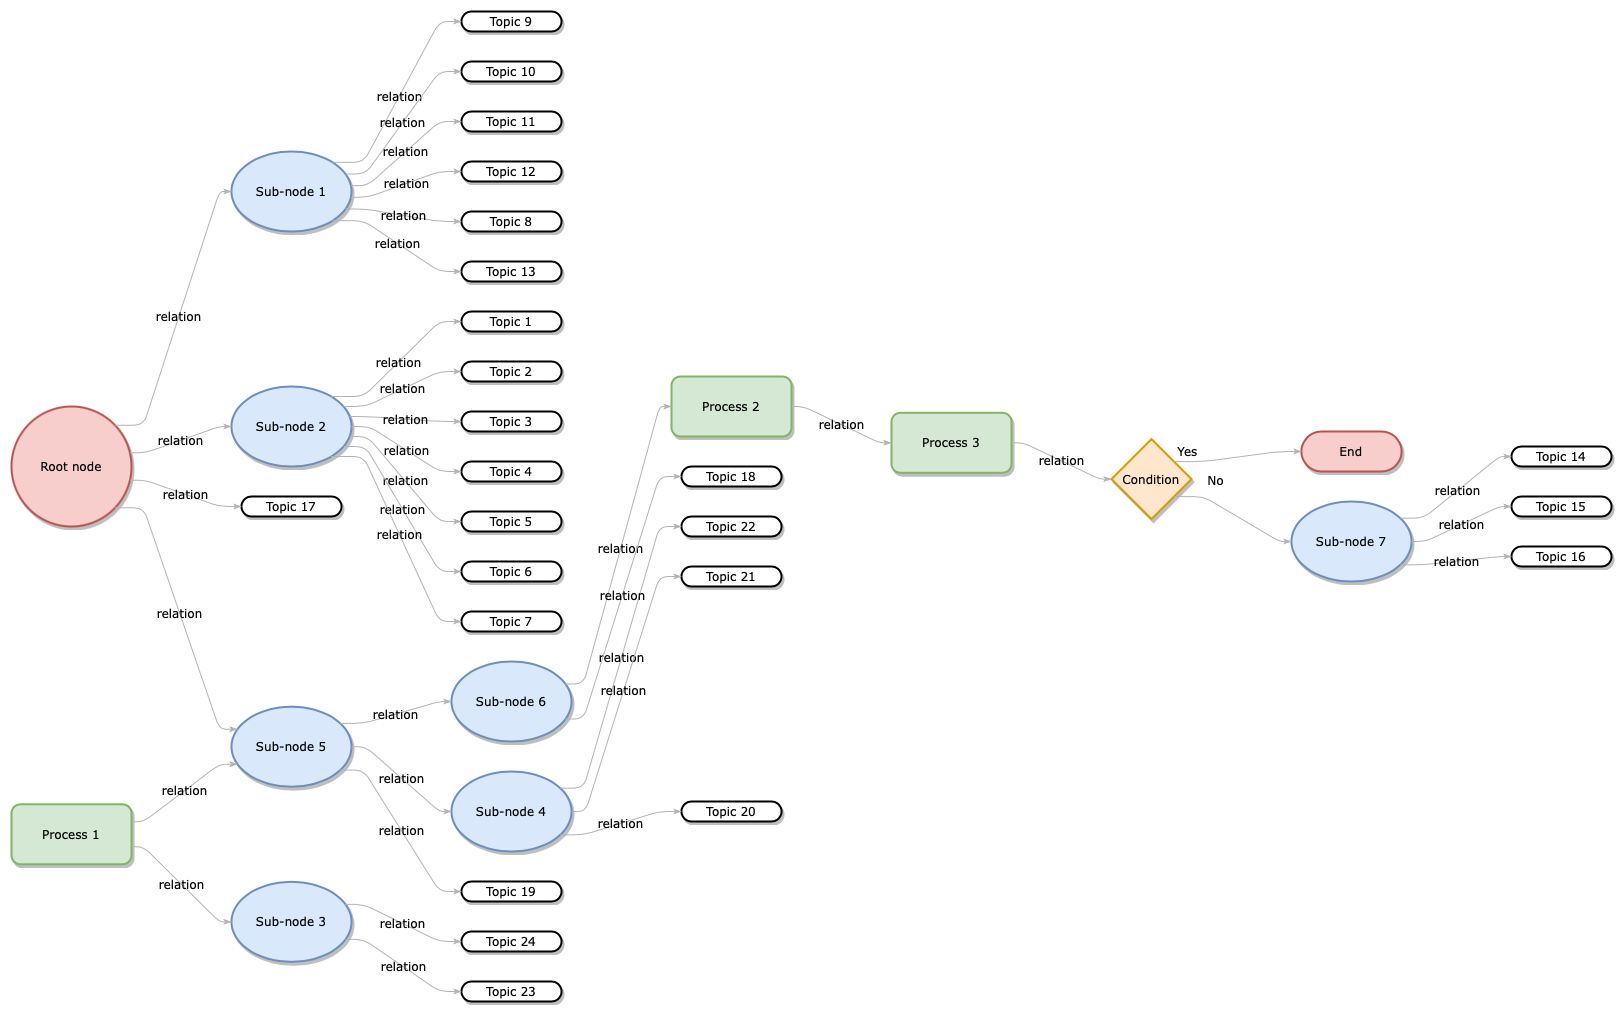
Horizontal flow
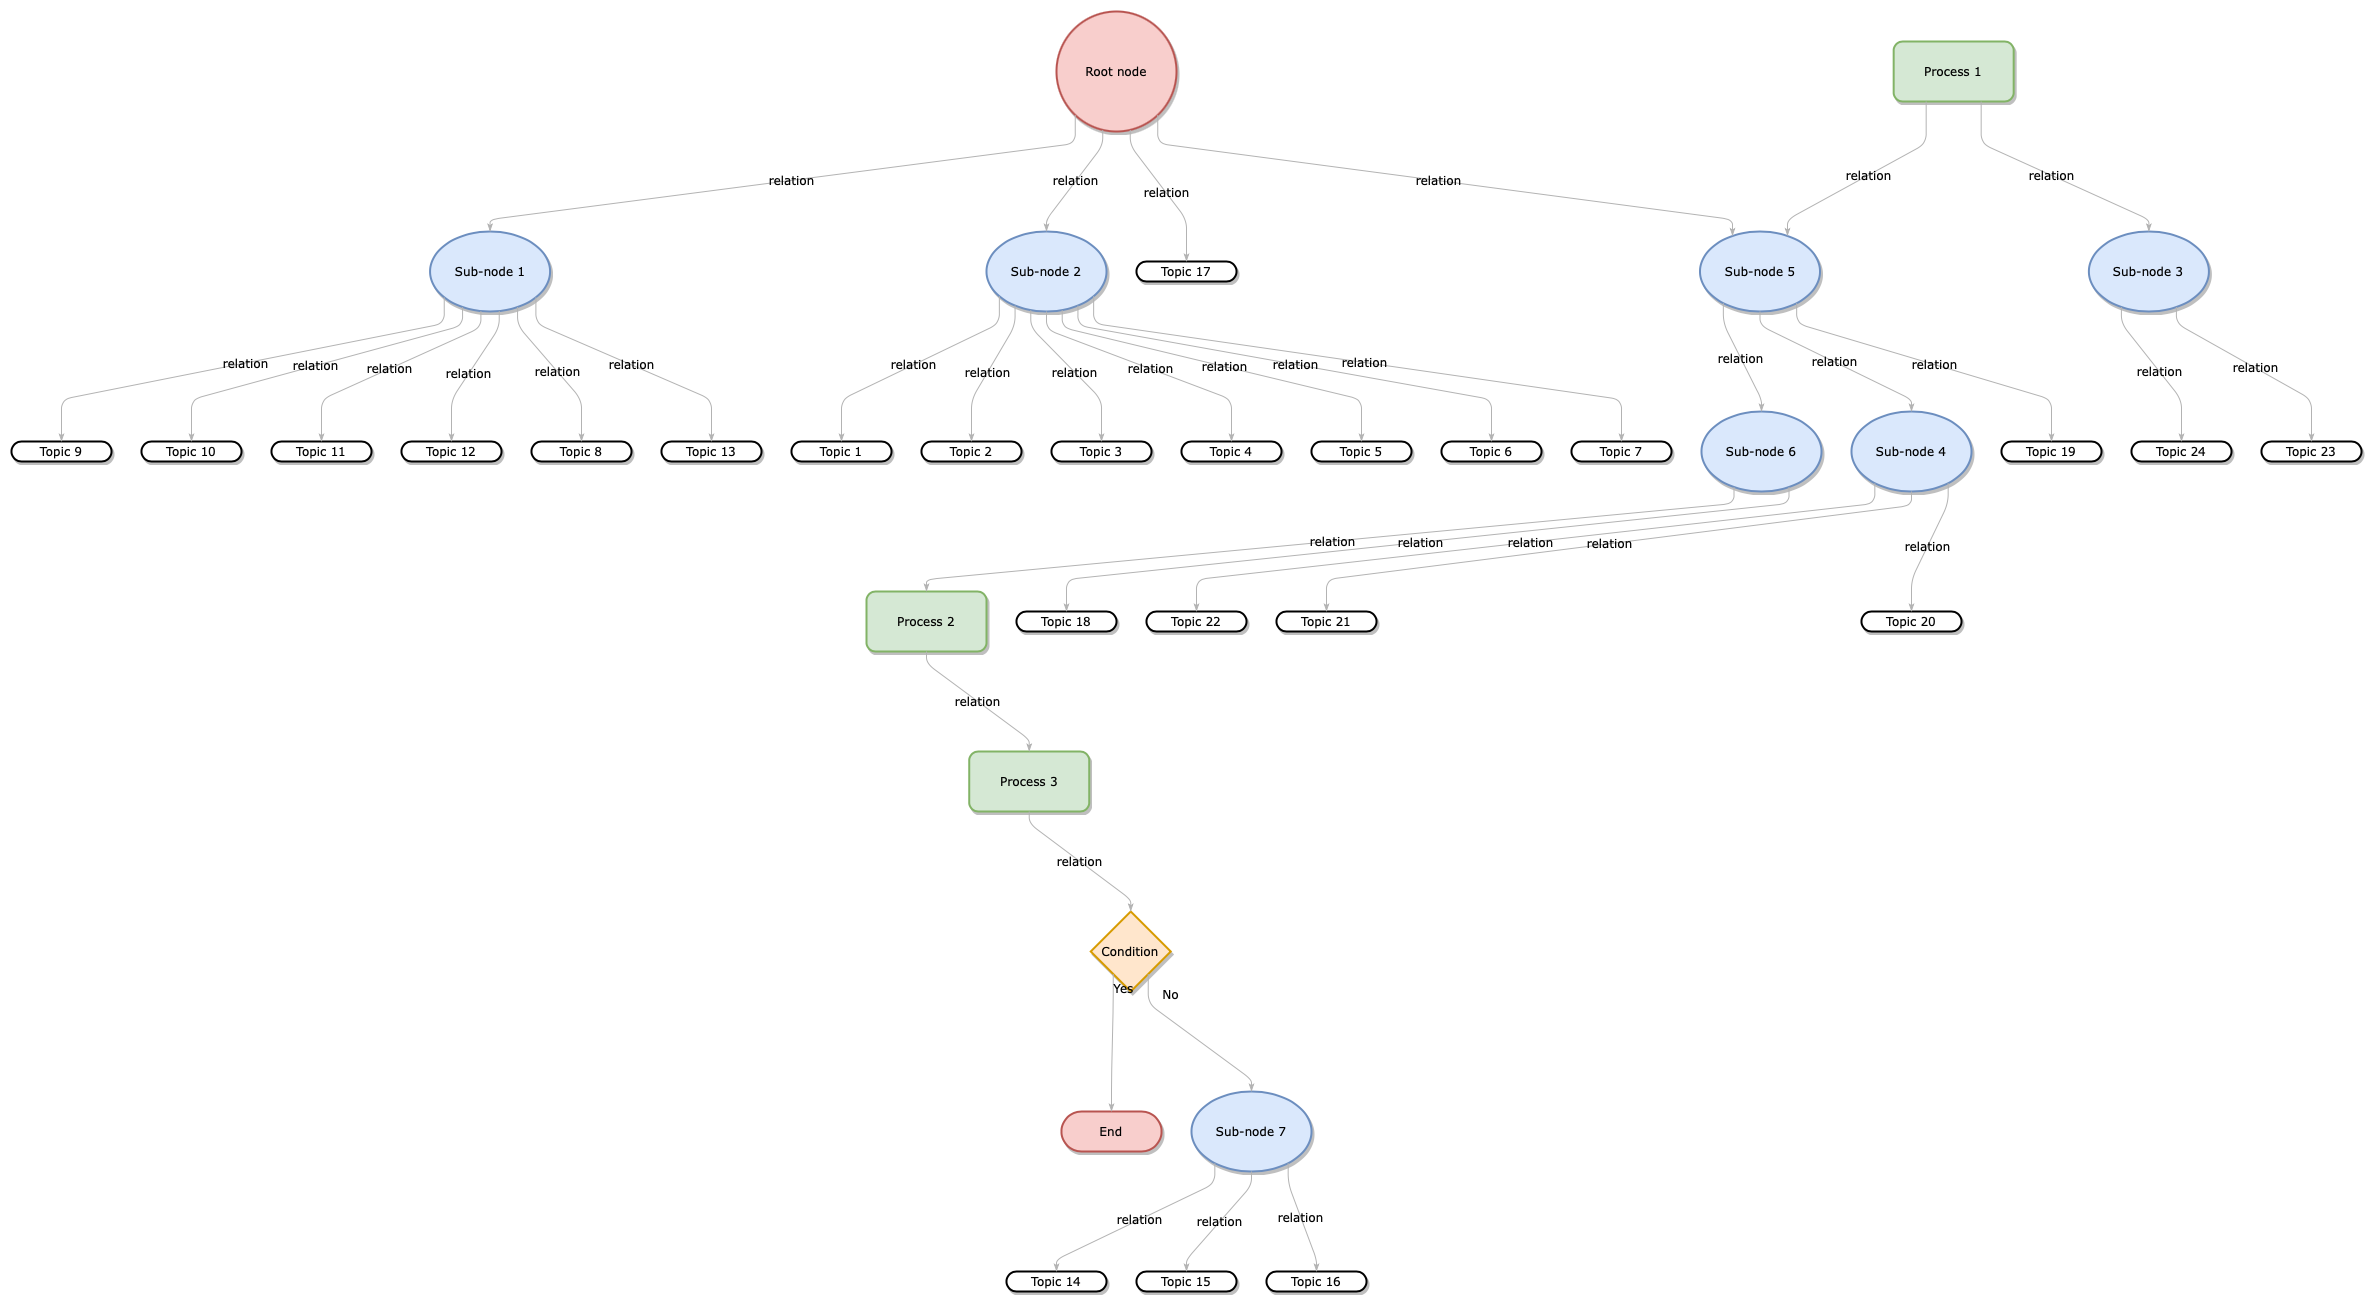
Vertical flow
Tree layouts
The previous example has flows in both directions, toward and away from the root node. The tree layouts applied that that particular diagram have poor readability. Using a simpler map from the template library, with all connectors moving outward from the root, the horizontal, vertical and radial tree layouts work well.
When you select one of the tree layouts, enter a number for the spacing between shapes, then click Apply.
 |
 |
 |
Horizontal tree, vertical tree, and radial tree layouts
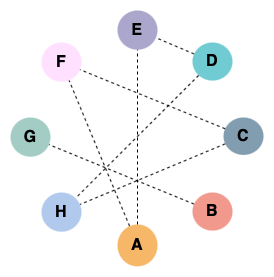
Circle layout
Rearranging shapes into a circle is useful when you are designing graphic components for slides or infographics. If shapes are connected, the resulting diagram looks like a social graph.
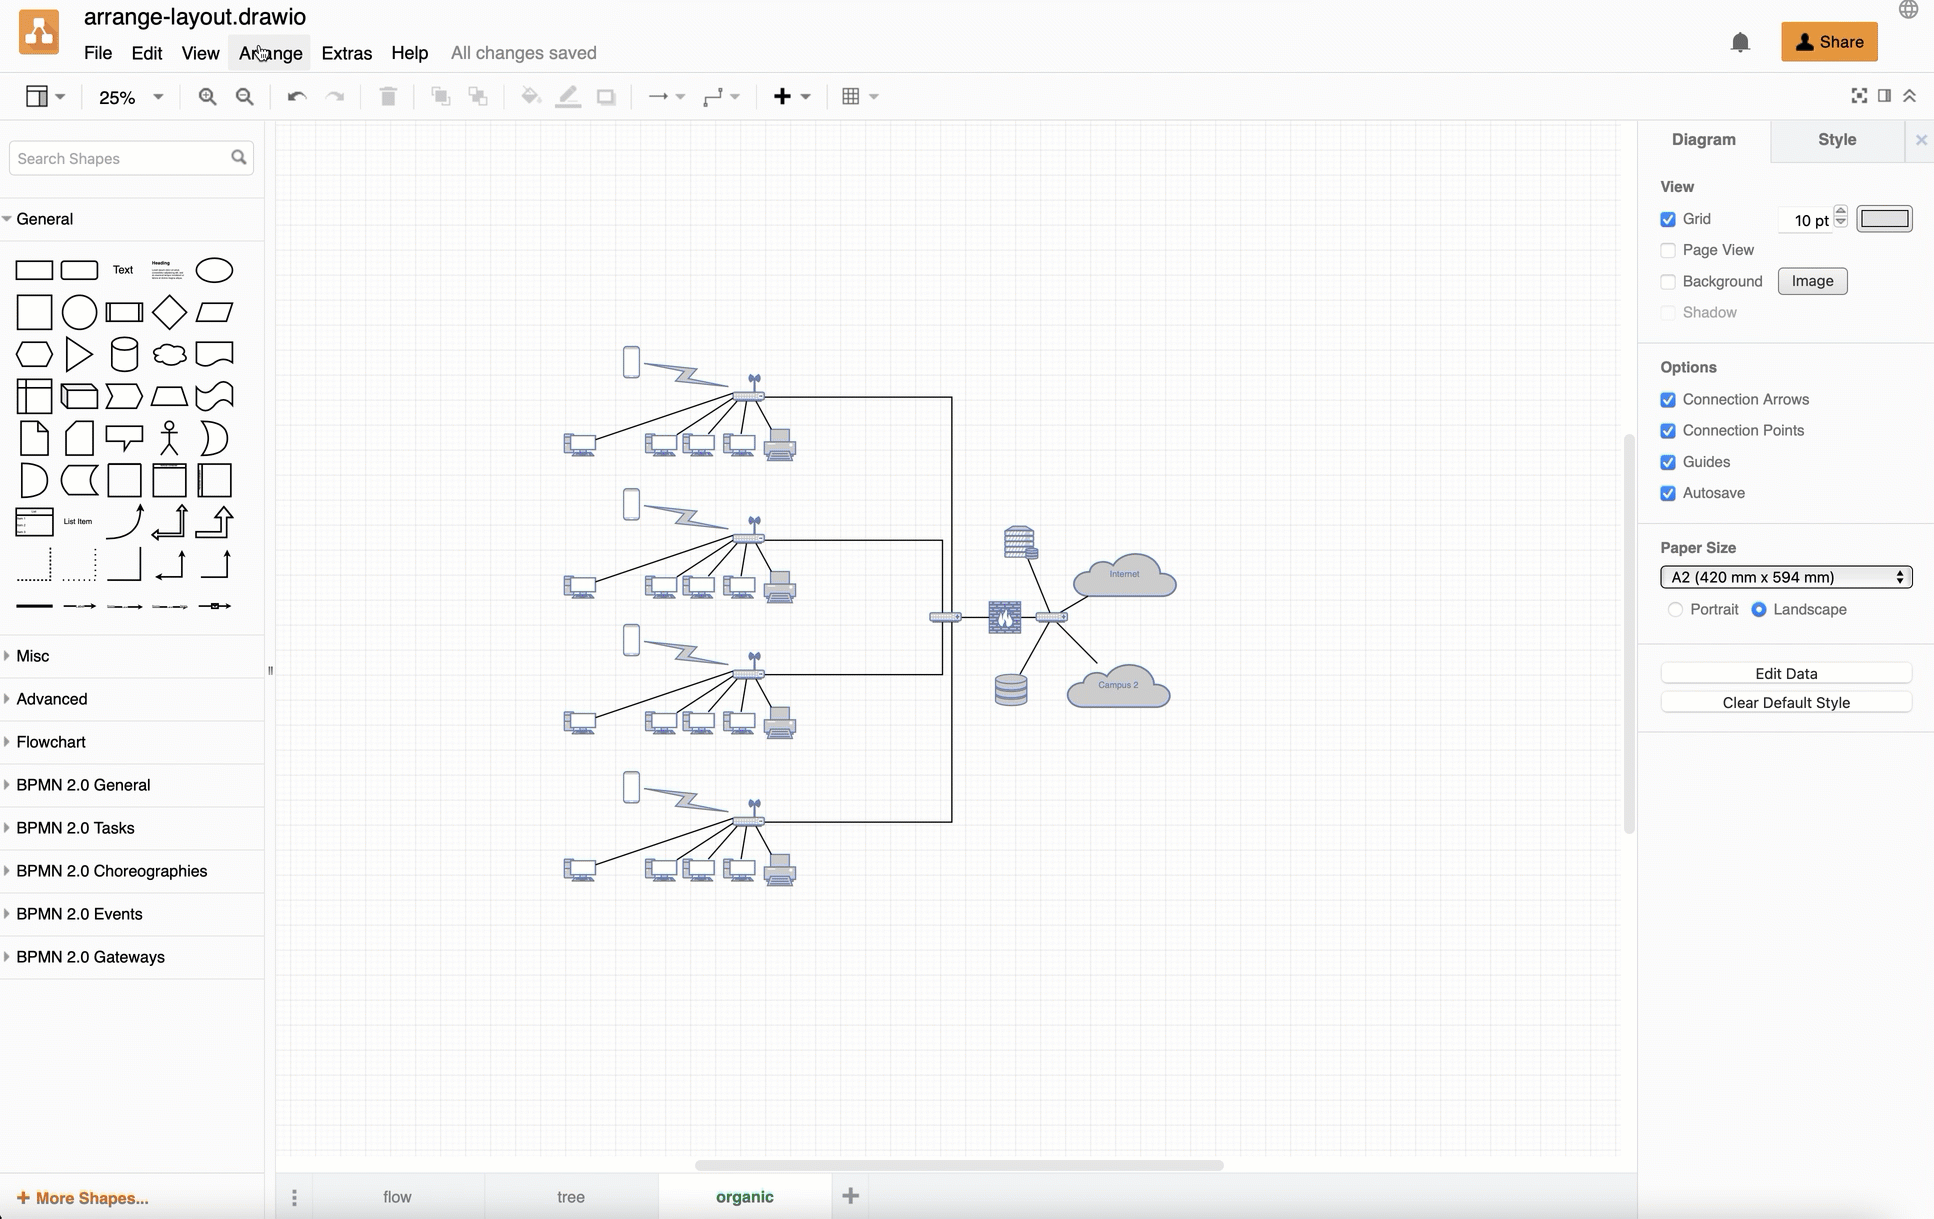
Organic layout
This works well for mindmaps and networks where devices are organised into clusters. For example, the organic layout below is applied to one of the network templates in the draw.io template library with a spacing.
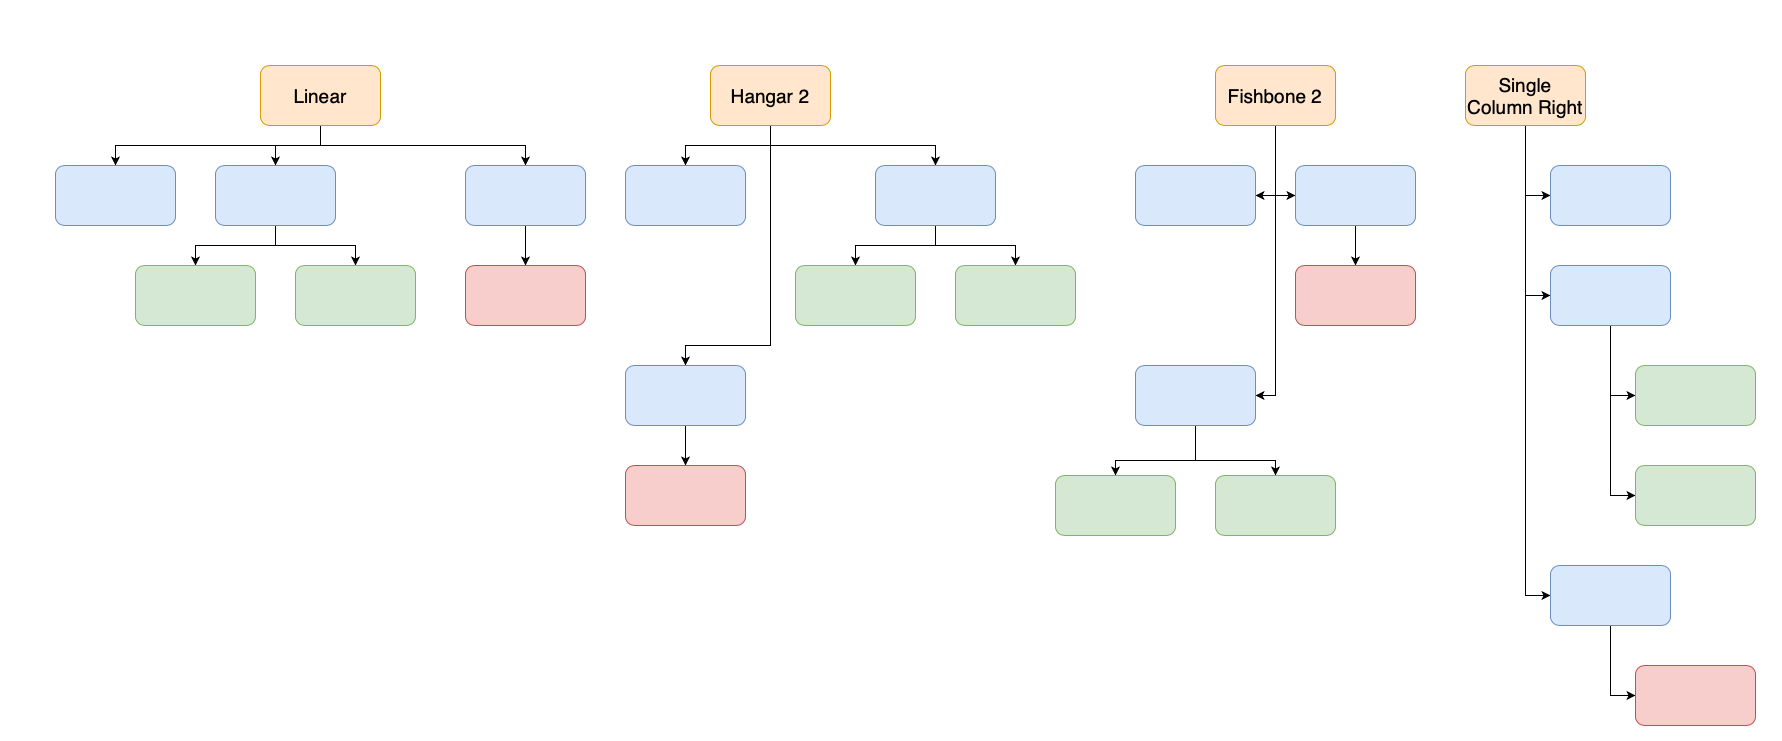
Org chart layouts
There are several different types of org chart layouts for tree diagrams: linear, hanger, fishbone, single columns, and smart.
- After selecting the Org chart layout from the menu, select the Org Chart Type from the list. Available types include: linear, hanger, fishbone, single column, and smart org chart layouts.
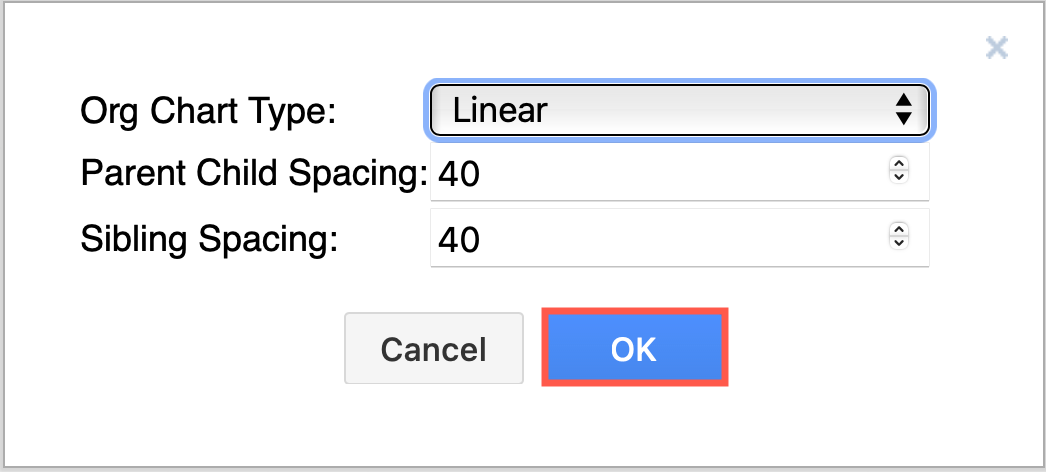
- Enter different values to change the space between parent and child nodes, or between sibling nodes.
To get the Orgchart config description for the Custom Layout dialog, click on the Custom button.
Parallels layout
Apply the parallels layout to expose and separate overlapping connectors between shapes.
Custom layouts
You can customise a layout by specifying a variety of layout parameters.
- Select Arrange > Layout > Apply.
- Copy over the example custom layout with the parameters and values you want to use in the text area, and click Apply.
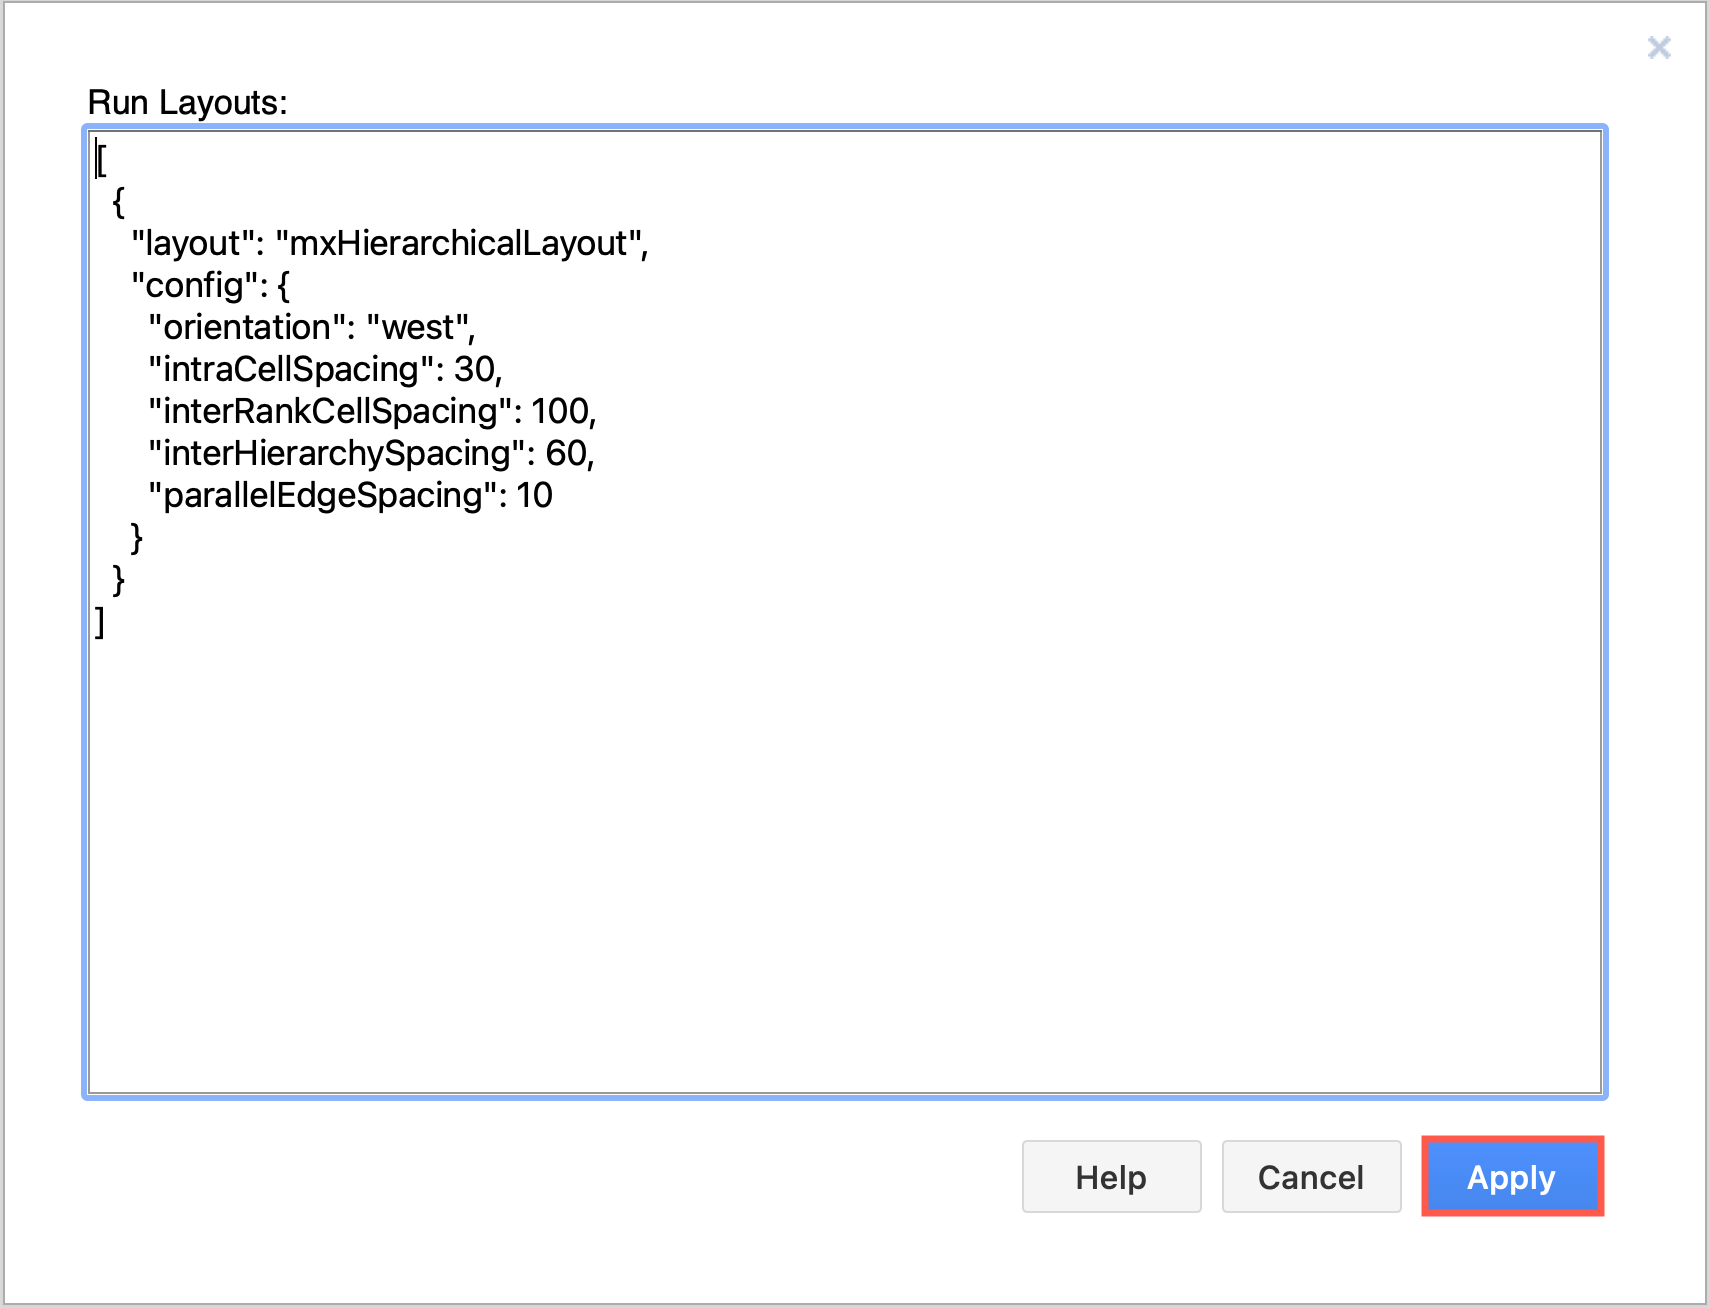
Refer to the Variables section on each of the following pages that describe a particular layout to see how these parameters are used.