Switching tools - how Gliffy and draw.io are different
It’s becoming more common for companies to change tools and applications regularly. That means users need to be migrated and get used to using new tools quickly. Unfamiliar workflows and tool positions inside the editor can cause frustration. In this post, we’ll explain some of the larger differences to help you make the switch from Gliffy to draw.io easier.
Differences between the diagram editors
There are a few notable differences in available tools between draw.io and Gliffy, as well as the workflow you follow in order to draw a diagram.
Add, save and publish a diagram
Adding a new diagram to a Confluence page isn’t much of a change - simply type /drawio instead of /gliffy and select either the draw.io Diagram macro for the full editor, or the draw.io Board macro for a simple whiteboard-like editor.
The draw.io Diagram macro asks you to enter a filename for your diagram immediately, whereas the draw.io Board macro and Gliffy will ask you for a filename when you first save or publish the diagram from within the editor.
In draw.io, click Publish in the top right to save your diagram and return to the Confluence page. In Gliffy, first Save your diagram, then click Back to Confluence to return the Confluence page.
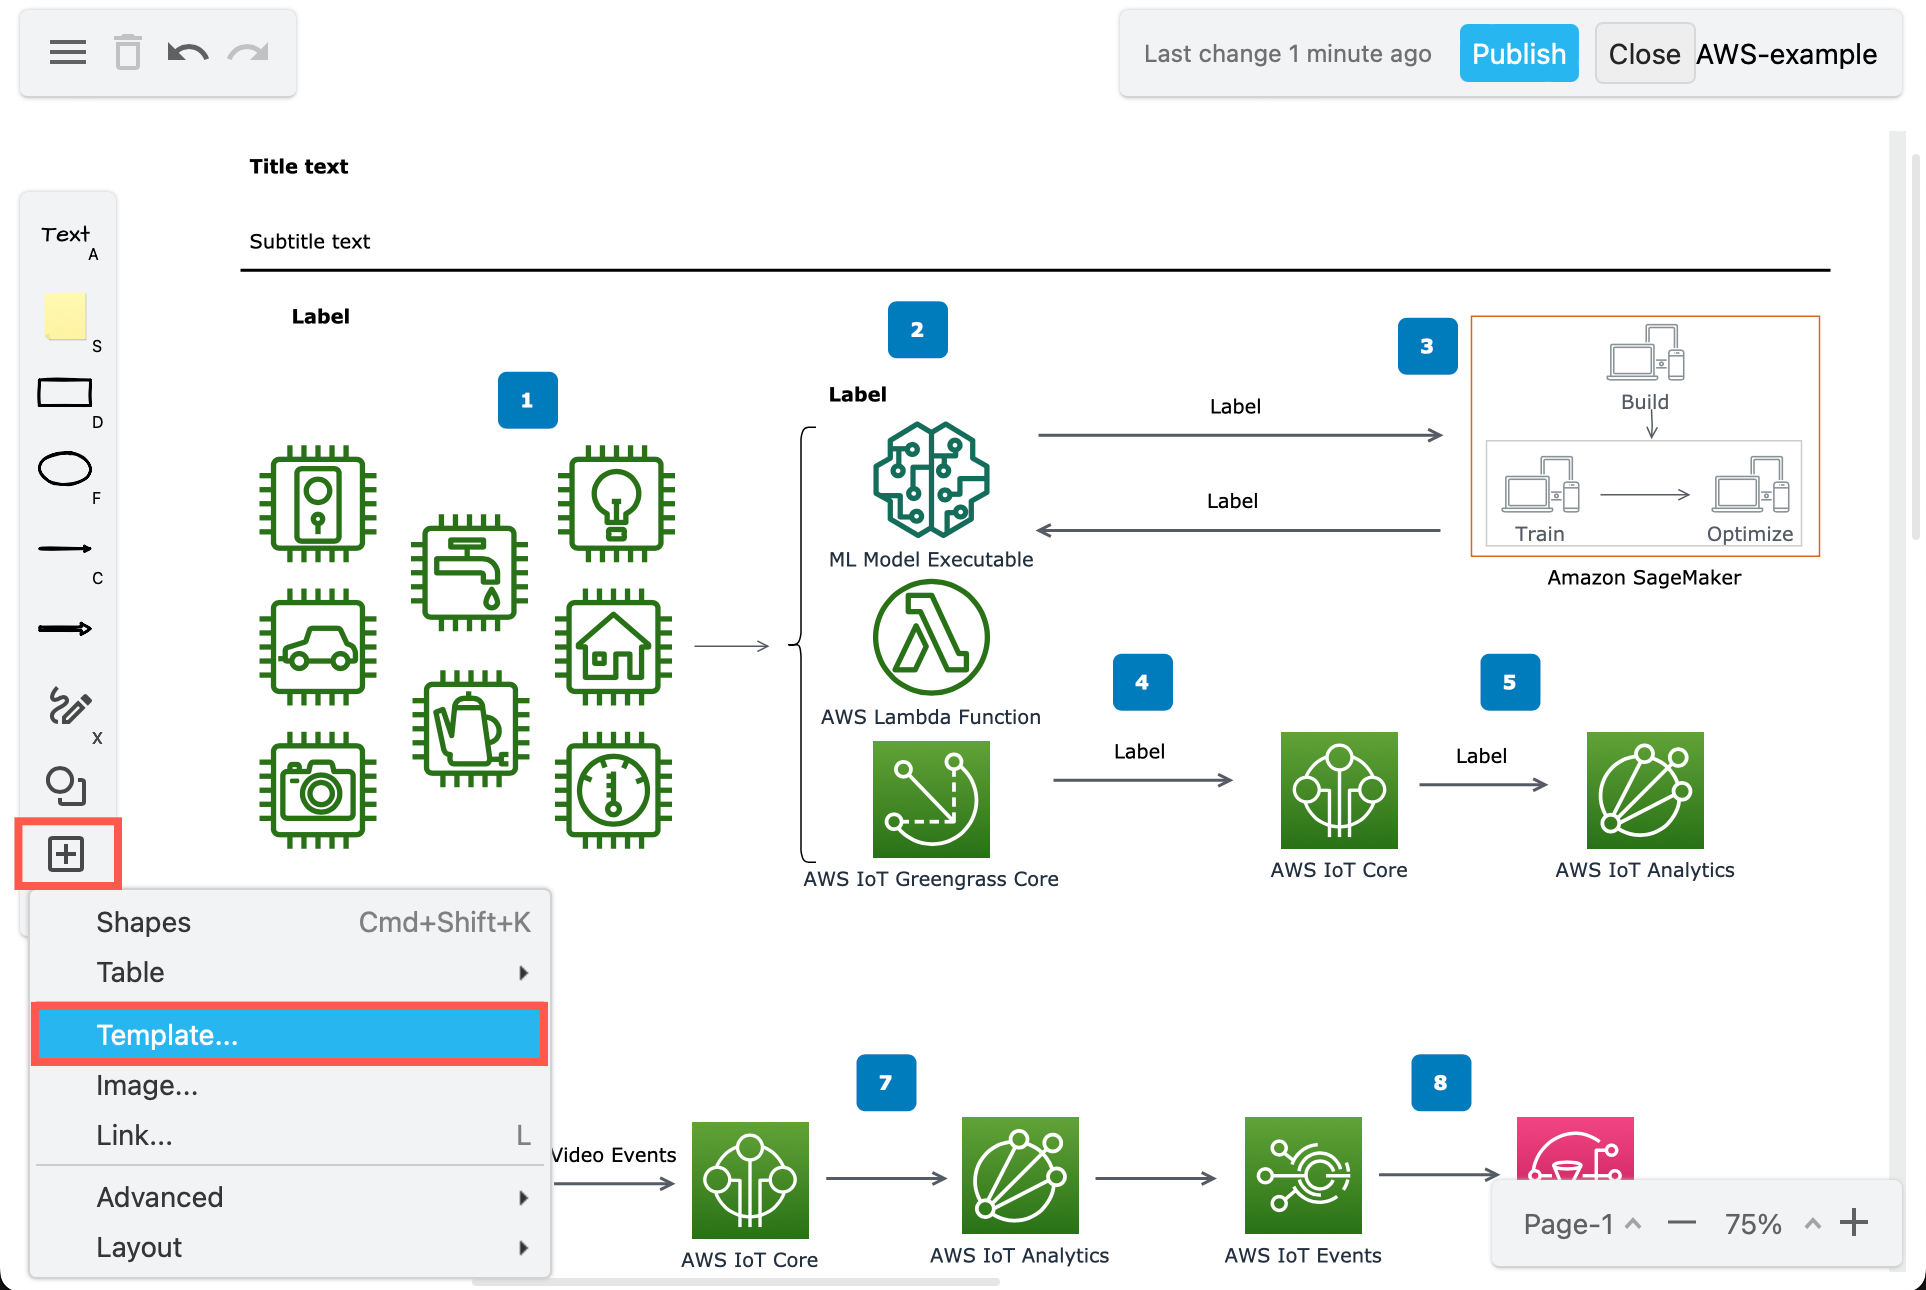
Template diagrams
You can only choose a template diagram in Gliffy when you add a new diagram. In draw.io, you can add a template to the drawing canvas at any time via Arrange > Insert > Template, or via the template tool in the draw.io Board macro.
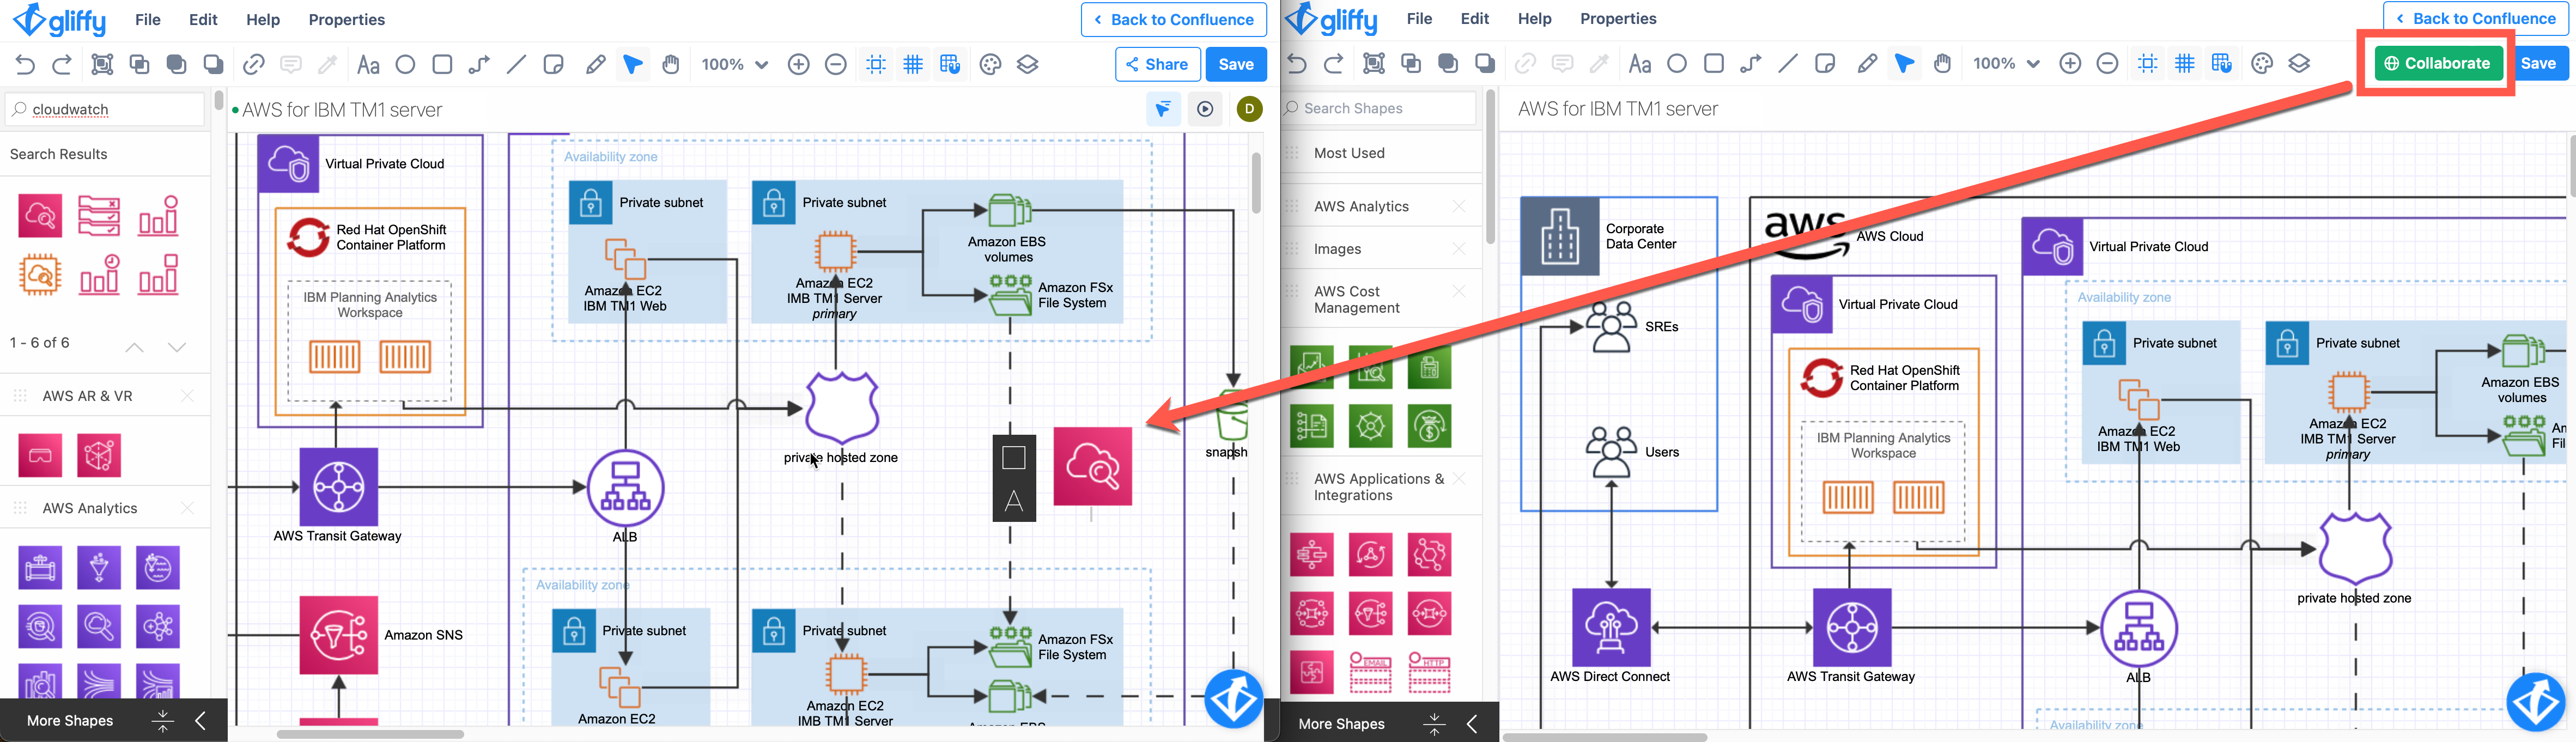
Real-time collaboration
Other Confluence users can’t see your draft of a page, so you need to save the diagram to the page and publish it once for your team members to access it.
In draw.io, real-time collaboration is always enabled for all diagrams - anyone who opens the diagram in the draw.io editor will see the other mouse cursors and changes that other editors are making. All team members’ changes are merged and synchronised in real time.
In Gliffy, you must click the Collaborate button to start and/or join a collaboration session. If multiple people try to edit the same diagram outside of a collaboration session, they won’t see each other’s edits, and their changes may be ignored or overwritten.
Shape libraries
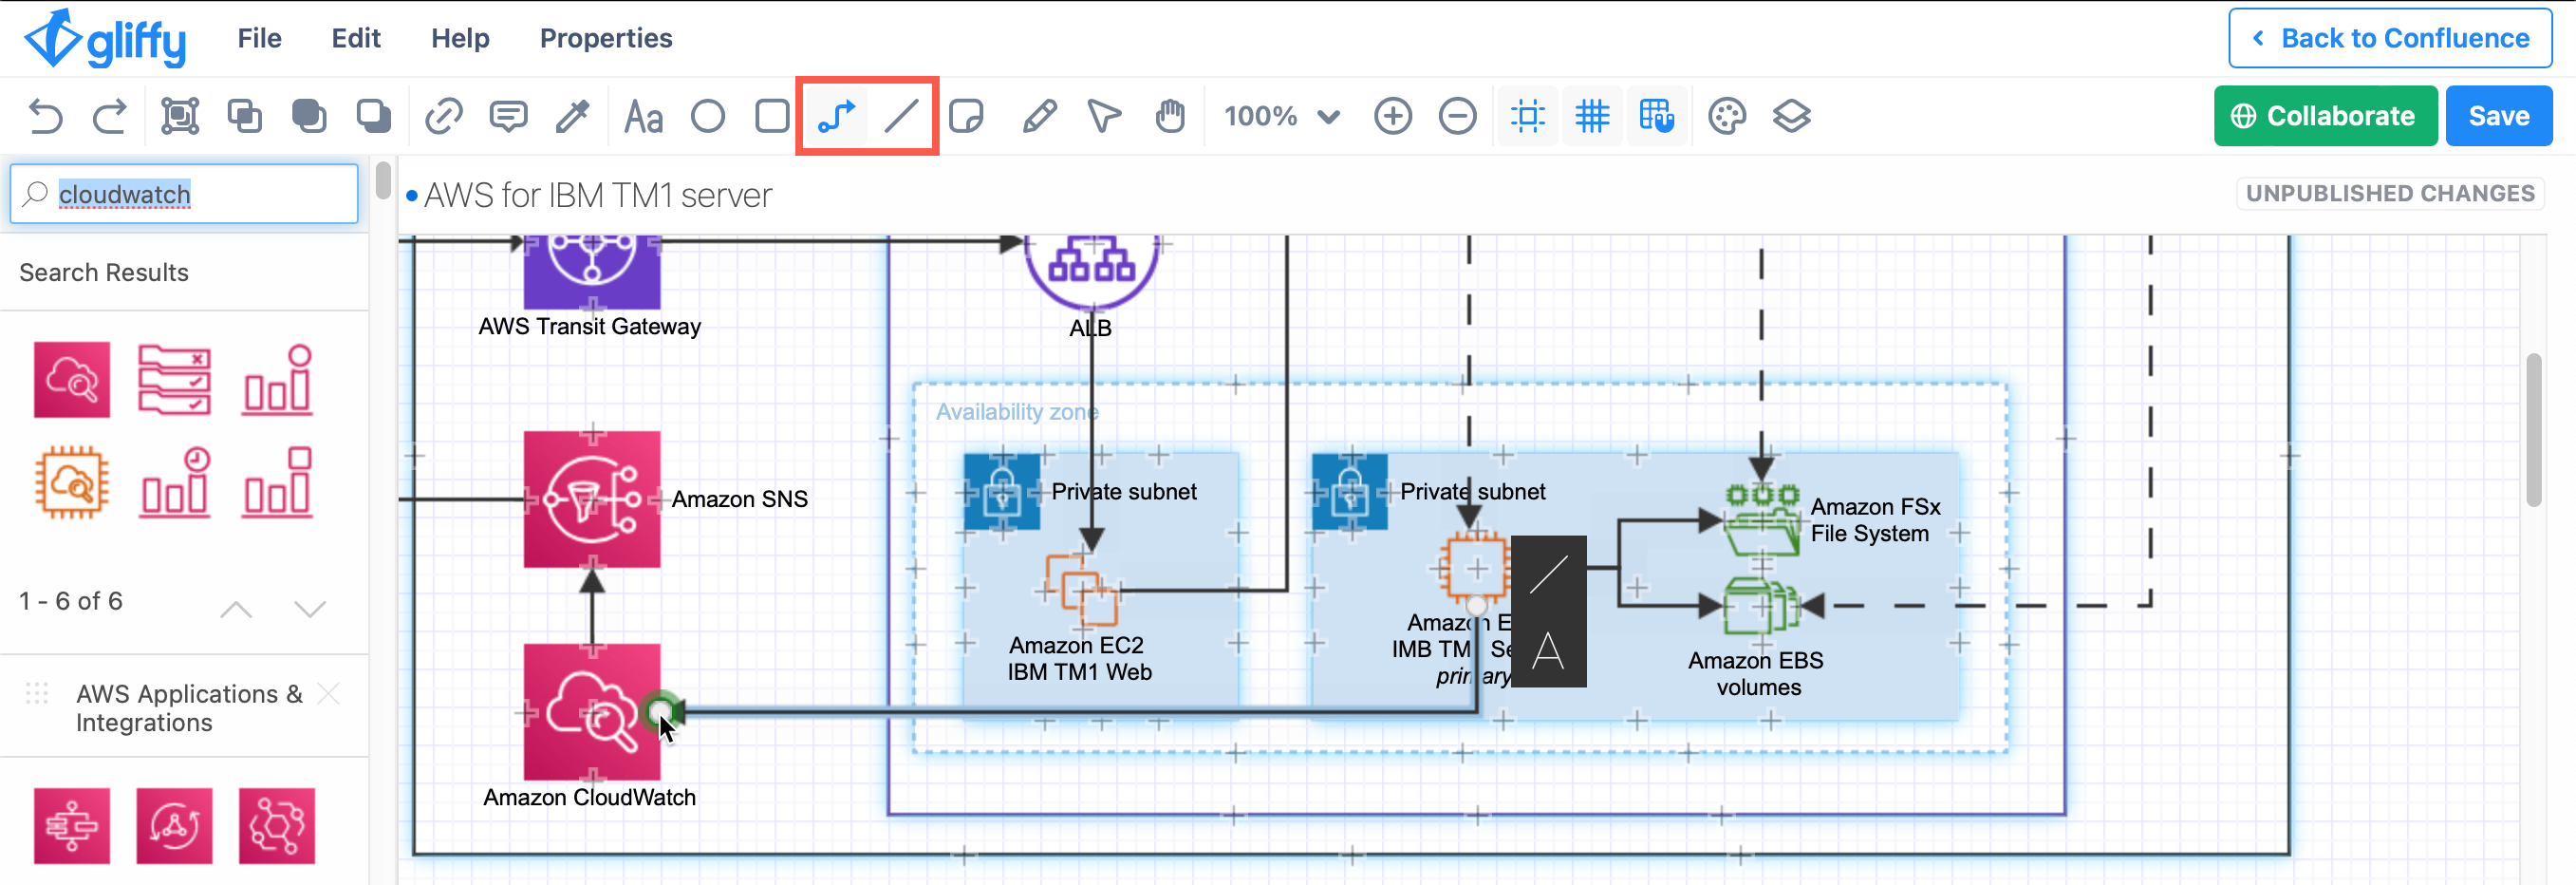
The search feature in draw.io searches all shape libraries, not just the shape libraries you have opened, as well as several icon sets for clipart and symbols.
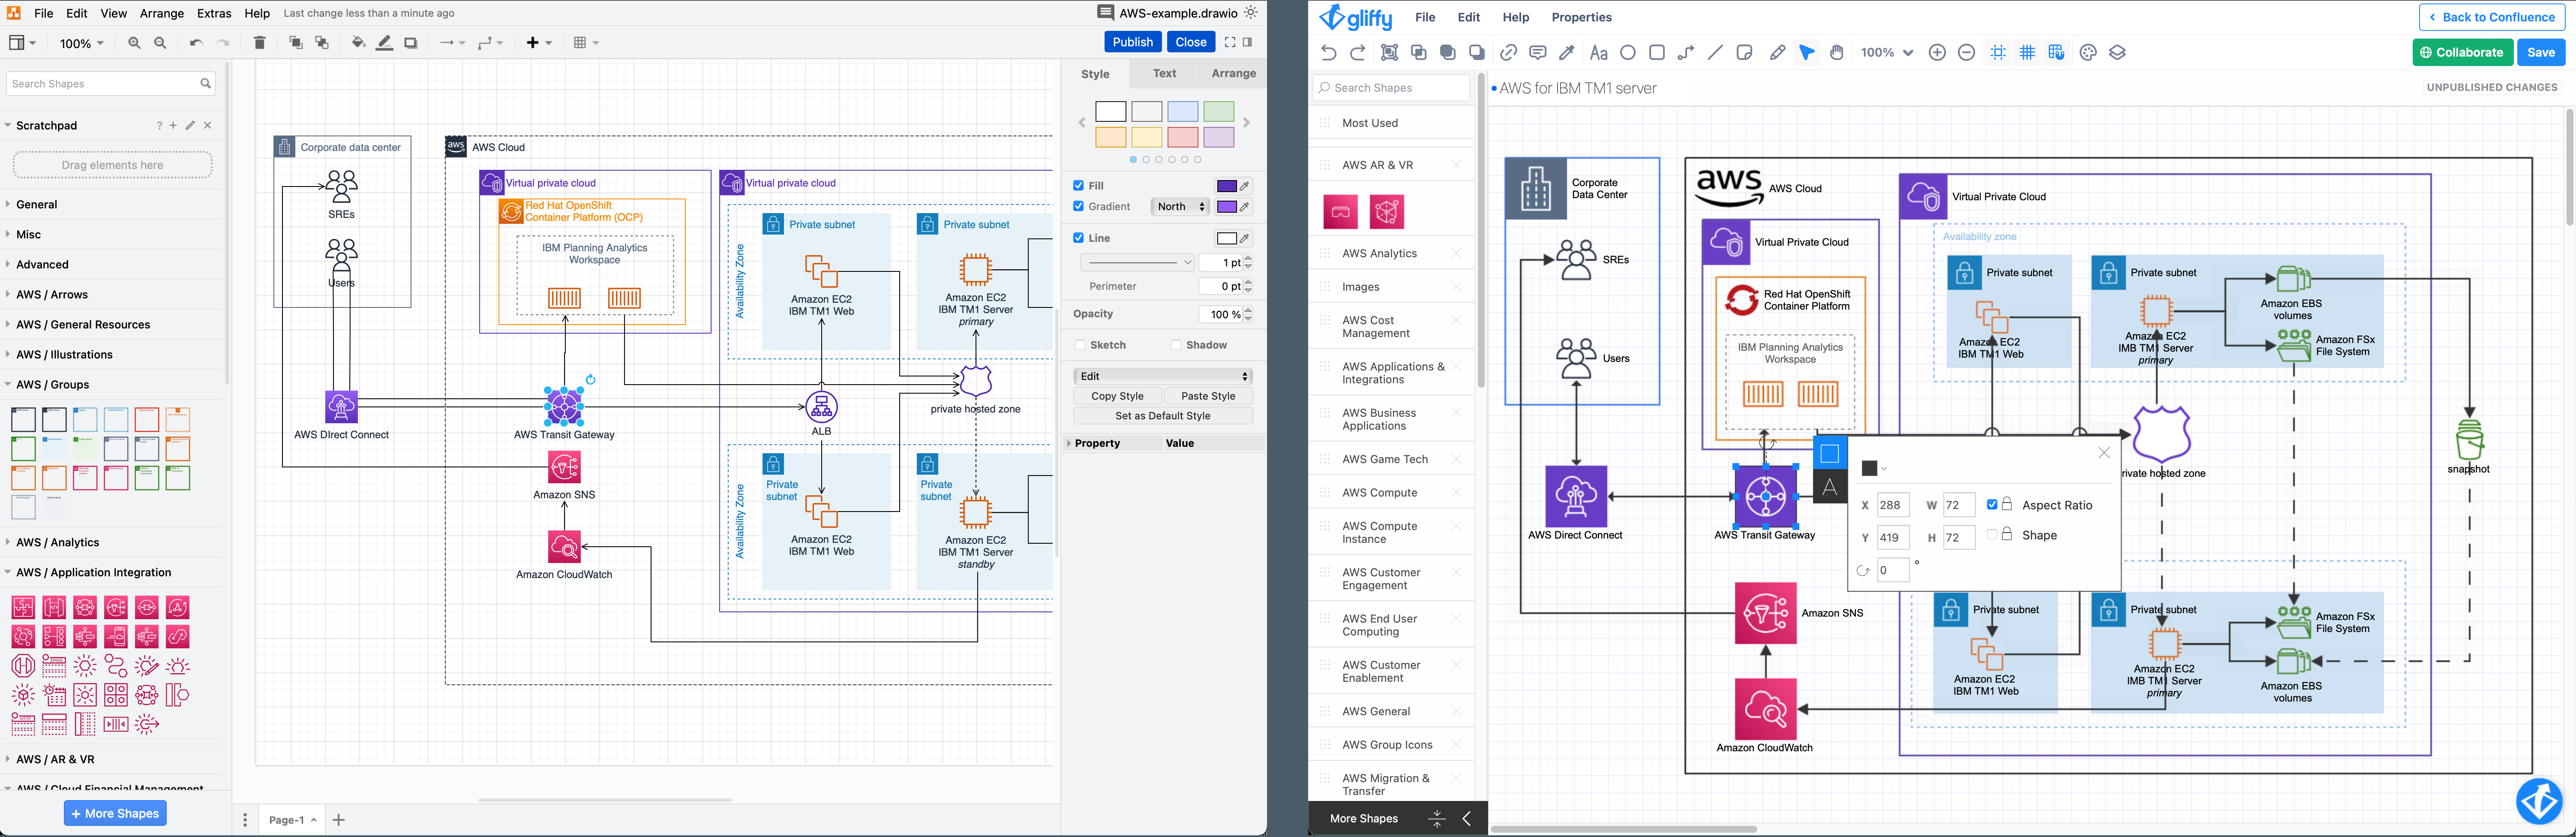
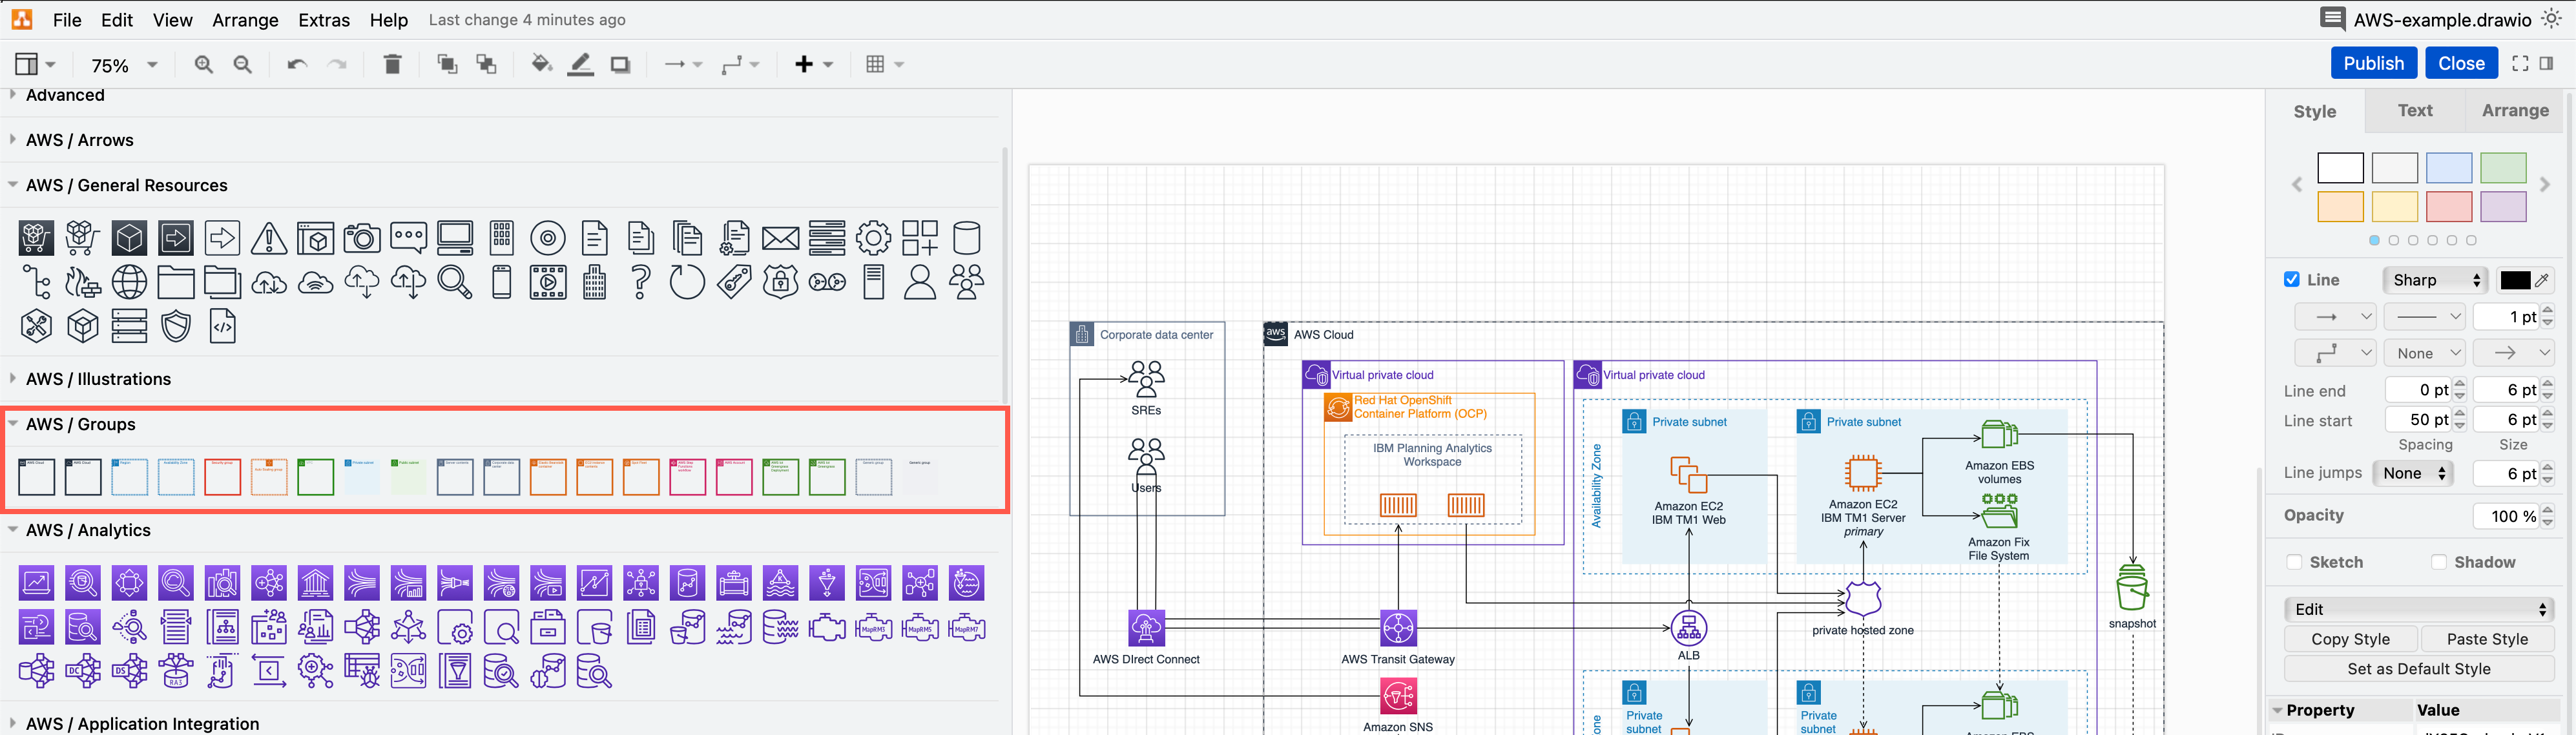
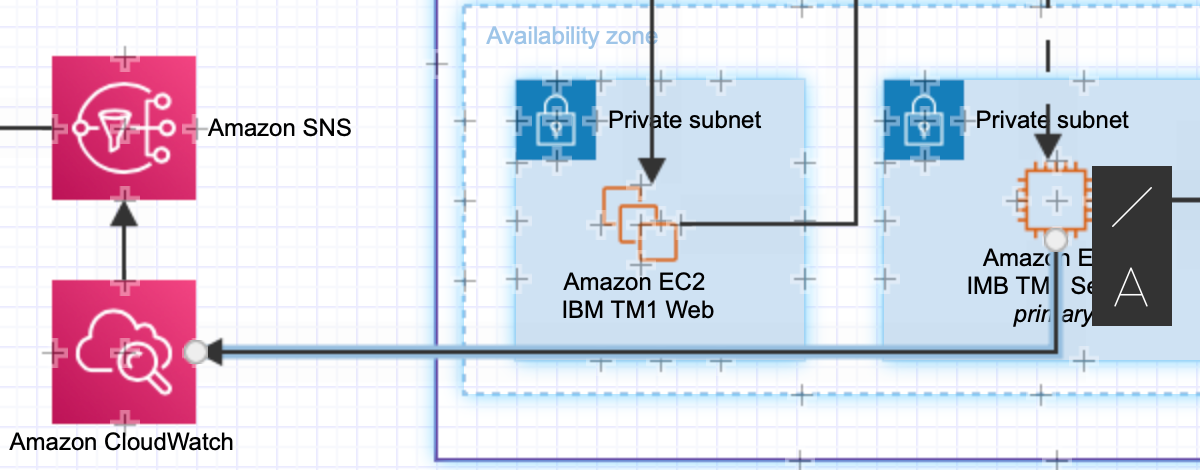
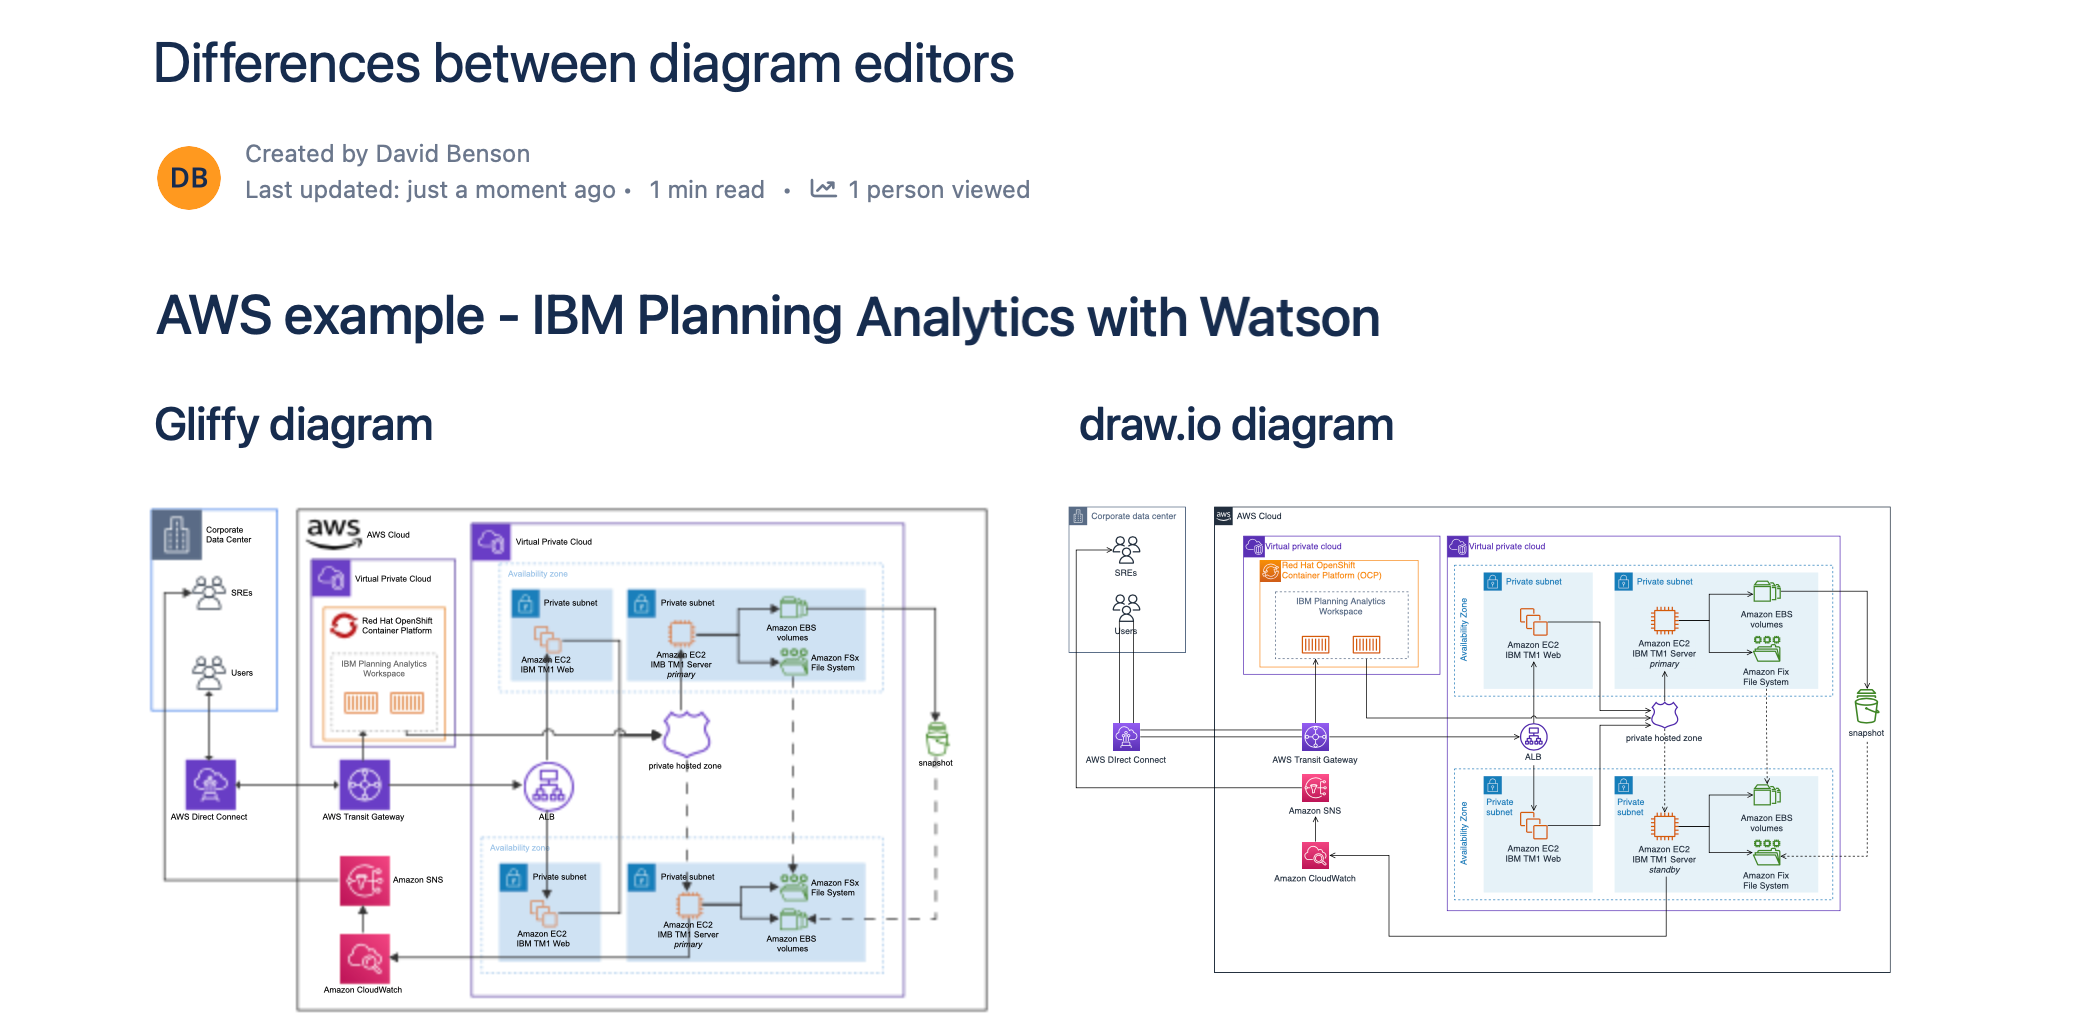
The shape libraries are also more extensive in draw.io. For example, the more recently defined AWS shapes aren’t yet available in Gliffy, and you need to manually build and style regions with AWS icons and a simple rectangle shape.
In draw.io, the AWS / Groups category from the AWS19 shape library contains a range of region shapes that are already styled, labelled and grouped. These function as containers - any shapes you place inside will move with the region when you move it on the canvas.
Tip: In the draw.ioe editor, the panels around the drawing canvas are resizeable so you can see more shapes in large shape libraries, such as those for cloud architectures.
Working with shapes
In draw.io you can add shapes in a number of ways, in addition to copying and pasting those already on the drawing canvas.
- click on any shape to add it to the drawing canvas
- drag a shape from the libraries on the left
- right-click on the drawing canvas to choose a shape from the quick selector
- click on any of the direction arrows on an existing shapes to clone the shape or add a new shape in the same style and connect them automatically

This feels quite different to Gliffy where you either need to drag the shapes from the shape library, or activate one of the shape modes in the toolbar to draw shapes on the canvas, and then style them manually.
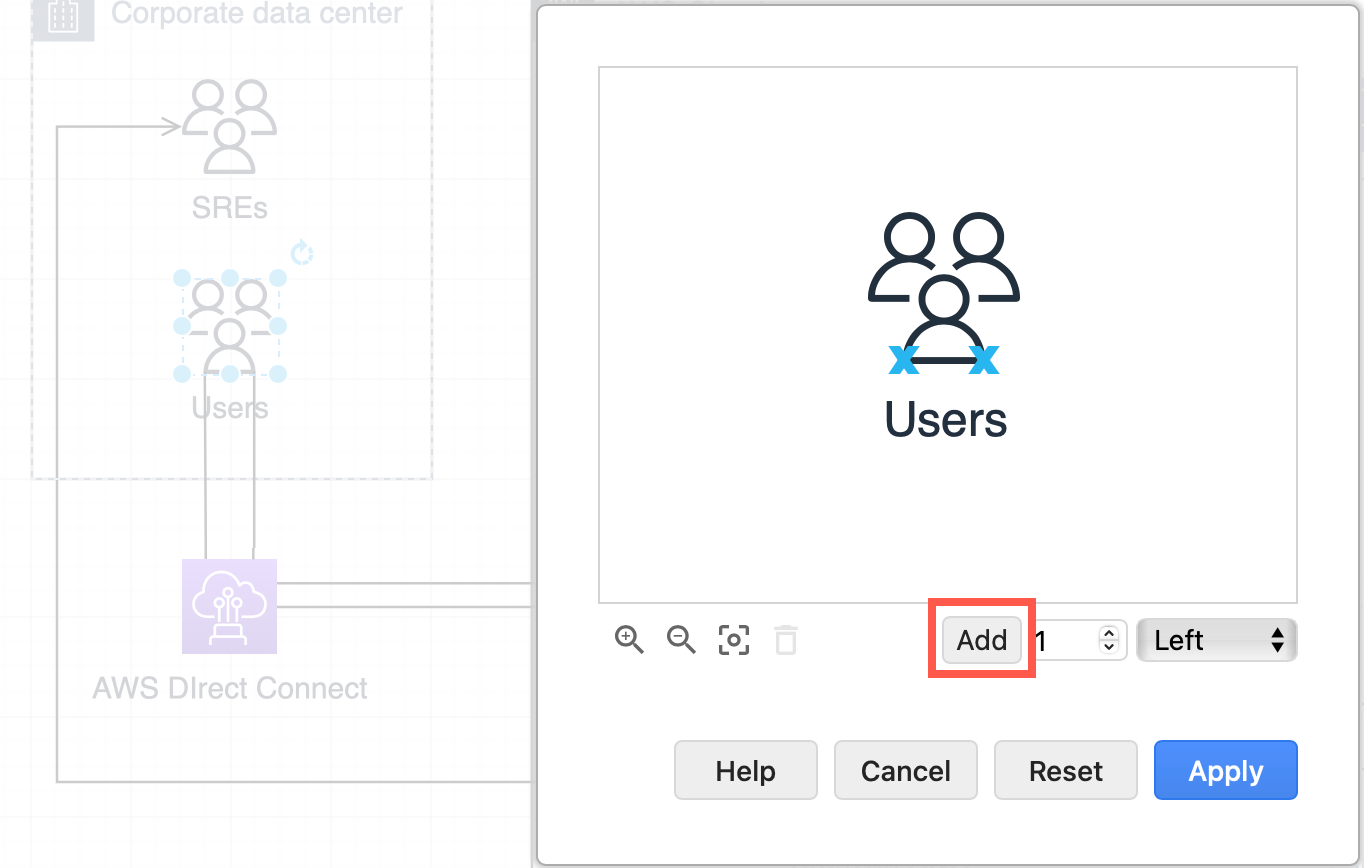
Shape labels: In both, select a shape and start typing to add or overwrite a label. However, in draw.io, double click to highlight the text in the label - you can now edit and format the text inside the label.
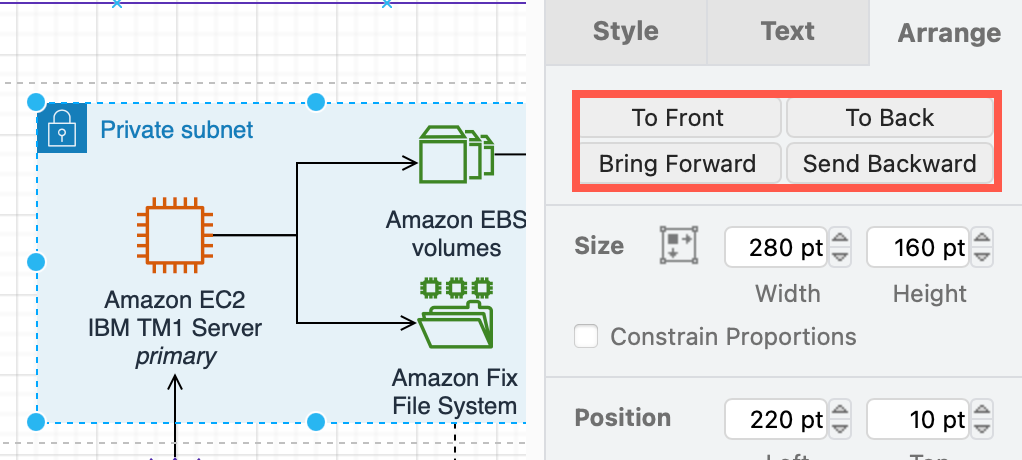
Order overlapping shapes: You can move shapes to the front or back of your diagram via the toolbar or the right-click context menu in both editors. In draw.io however, you can also step shapes incrementally forwards or backwards.
Connectors
You don’t need to change diagramming modes in draw.io. Hover over any shape and drag a connector from one to the other to connect them.
-
In draw.io, floating connectors move around shapes to take the optimal path. Drag a new connector one from one of the blue direction arrows and drop it on the target shape when its outline is blue.
-
For fixed connectors in draw.io that stay attached to a shape at a specific position, drag a connector from a little green cross (fixed connection point) and drop it onto another green cross. Alternatively, hold
Altas you drop the connector on the target shape to keep it attached at any point within the shape perimeter.
See the difference between floating and fixed connectors
In Gliffy, connectors are always fixed to a point on the shape.
Activate the Straight Line or Connector tool in the toolbar then drag and drop a fixed connector from a source shape to the target shape.
You can also drag and drop fixed connectors from the four direction arrows that appear when you hover over a shape while using the Pointer tool.
Customise connection points on shapes in draw.io: Right-click on a shape then select Edit Connection Points to customise its fixed connection points.
Change a connector’s path
-
In draw.io, drag existing connectors to follow any path you want - the editor automatically adds new waypoints to shape the connector. To add space between the shape and the connector’s start or end point to ensure your diagram is readable, use the Line end and Line start options in the Style tab.
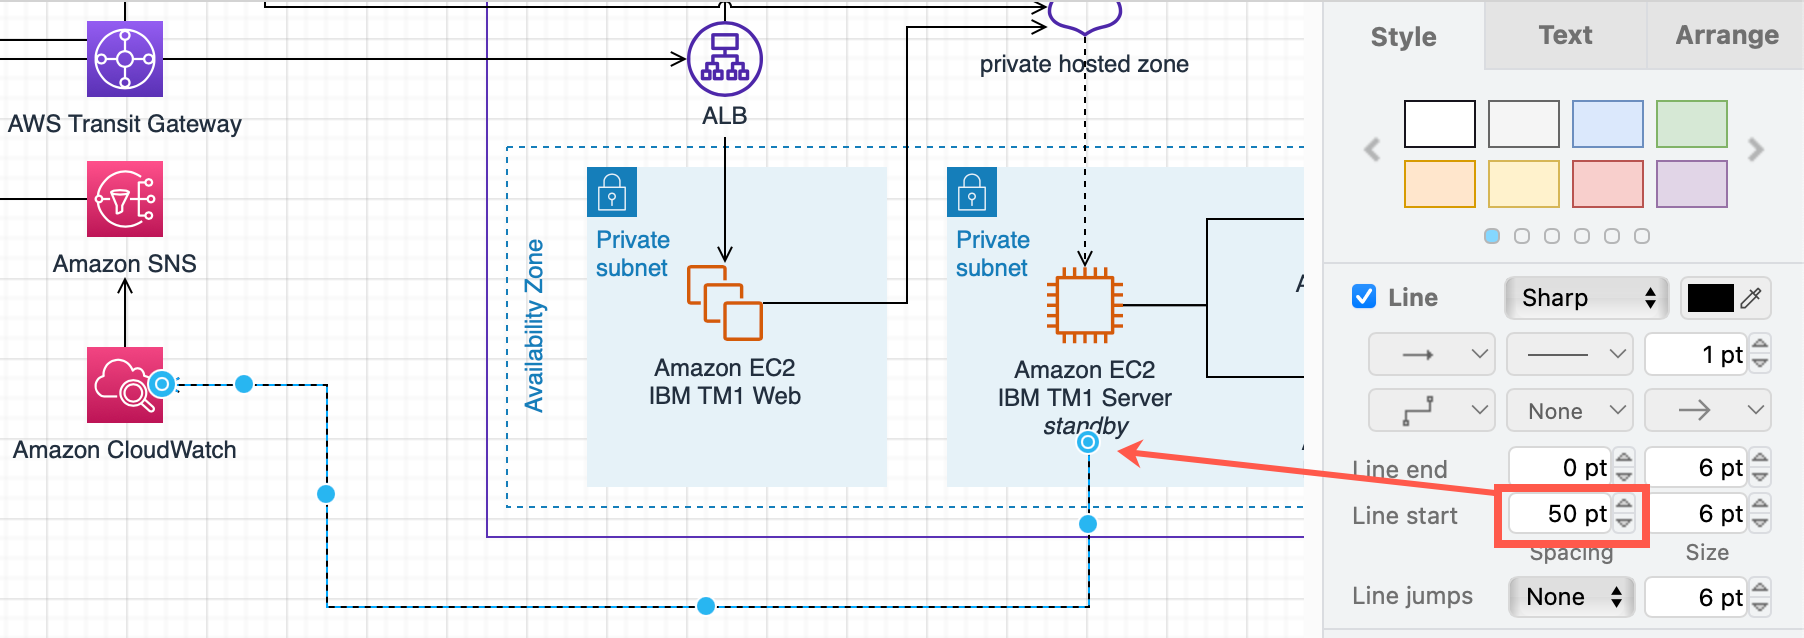
-
Gliffy connectors always take a direct path between their connection points with the fewest waypoints possible, even if they overlap shapes or obscure text.
Connector labels
Select a connector and start typing in both to add a label. In draw.io, you can have three different labels on a connector - one in the middle and at either end.
-
In Gliffy, reposition the connector label by dragging it around - it will stick quite tightly to the connector’s path.
-
In draw.io, drag the diamond handle to reposition the label. It can be placed quite far from its connector. Keep in mind that when you change the connector’s path in draw.io, the position of the label will move with it.
Styling shapes, connectors and text
Adding styles to shapes, text and connectors is quite different in the two diagram editors.
-
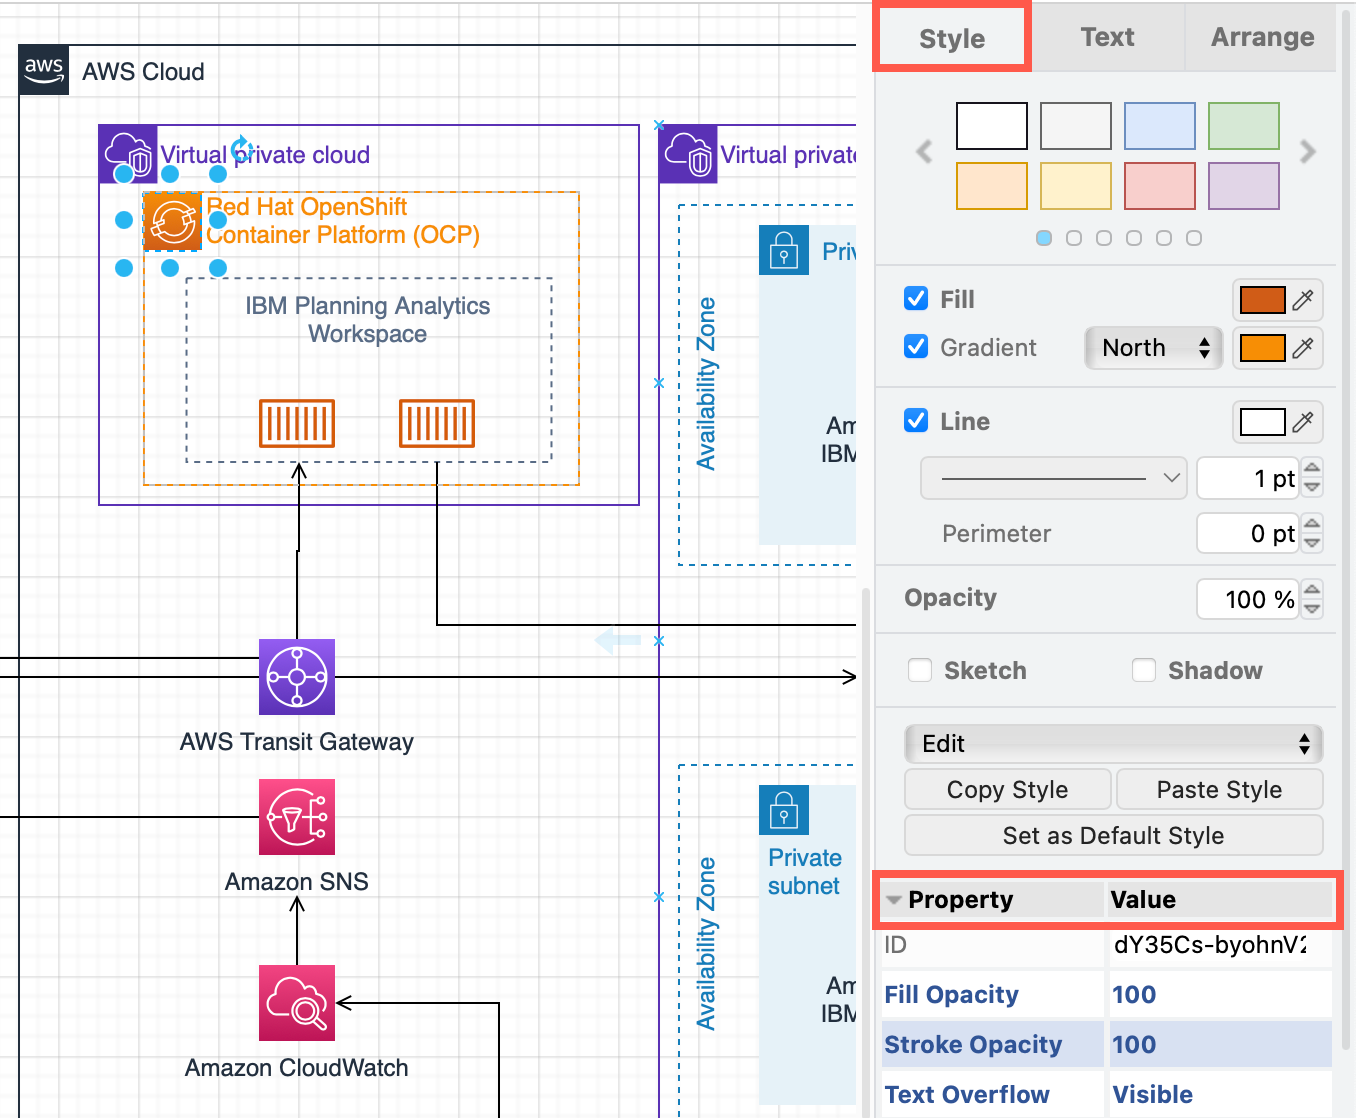
In draw.io, the format panel on the right shows a wide range of styling options for shapes and connectors in the Style tab, and labels and text in the Text tab. Access the extended shape properties via the expandable Properties section at the bottom of the Style tab.
-
In Gliffy, change the shape and text styles through the a context selector next to the selected shape. Many shapes are not able to be styled.
Both editors can style text within labels. In draw.io, you may need to enable the Formatted text checkbox in the Text tab of the format panel first. In draw.io, you can also reposition labels exactly by setting margins, and use superscript, subscript and strike-through formatting.
Working with layers
In draw.io, open the layers dialog via View > Layers in the menu. WHen you drag one layer above another in this list, it will raise the shapes on that layer above those on the layers below. To move selected shapes to a new layer, click on the three vertical dots and select the target layer.
In Gliffy, open the layers panel via Layers in the toolbar. You can’t change the order of the layers in this list. Move shapes between layers via the right-click context menu on each shape.
In both diagram editors, you can draw connectors between shapes that are on different layers.
Exporting diagrams
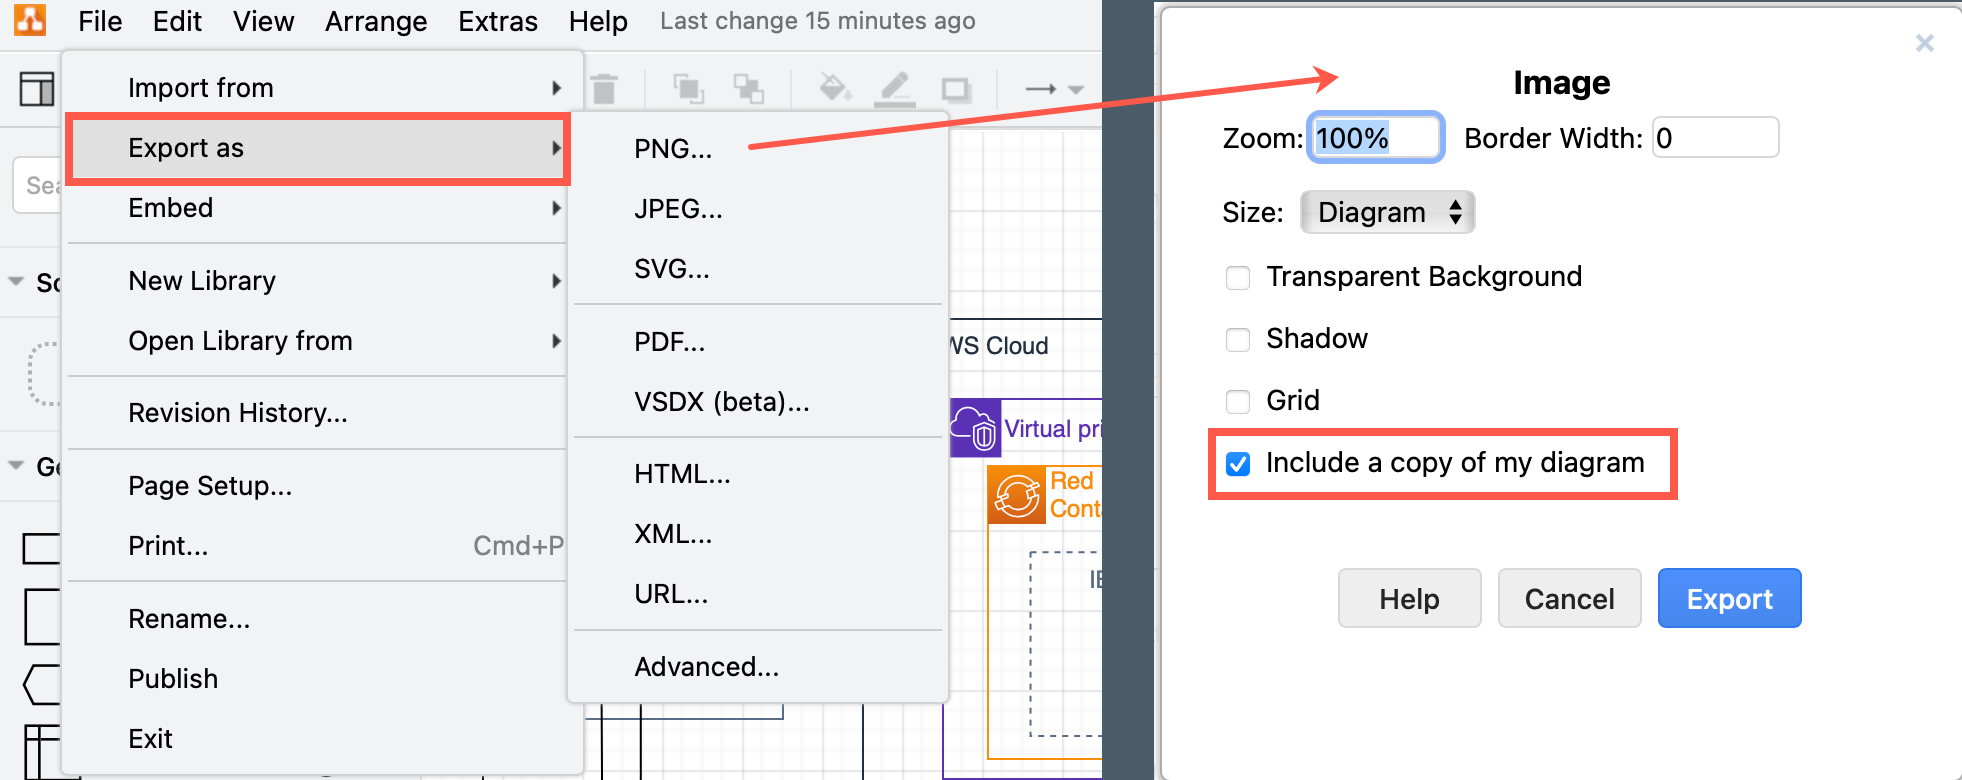
draw.io can export to a number of image and document formats including JPG, PNG, SVG, PDF, VSDX, HTML, XML, and even encode the diagram in a long URL.
Additionally, diagram data can be embedded in exported SVG, PNG and PDF files so that when you drag one of these onto the draw.io canvas, the diagram will be imported, rather than a static image.
Gliffy can export to static images (PNG, JPG, SVG) and Gliffy diagram formats.
Importing diagrams from other formats
With draw.io, you can drag and drop diagram files in various formats to convert and import them, including Gliffy, Lucidchart, .vsdx / .vdx diagrams, and other draw.io diagrams saved as SVG, PNG, and PDF files with embedded diagram data, or in the .drawio or .xml formats.
draw.io can also mass import and convert all the Gliffy diagrams in a Confluence instance at once, making migration easy for a Confluence administrator. It doesn’t alter the Gliffy diagrams attached to Confluence pages, so there is never any data lost.
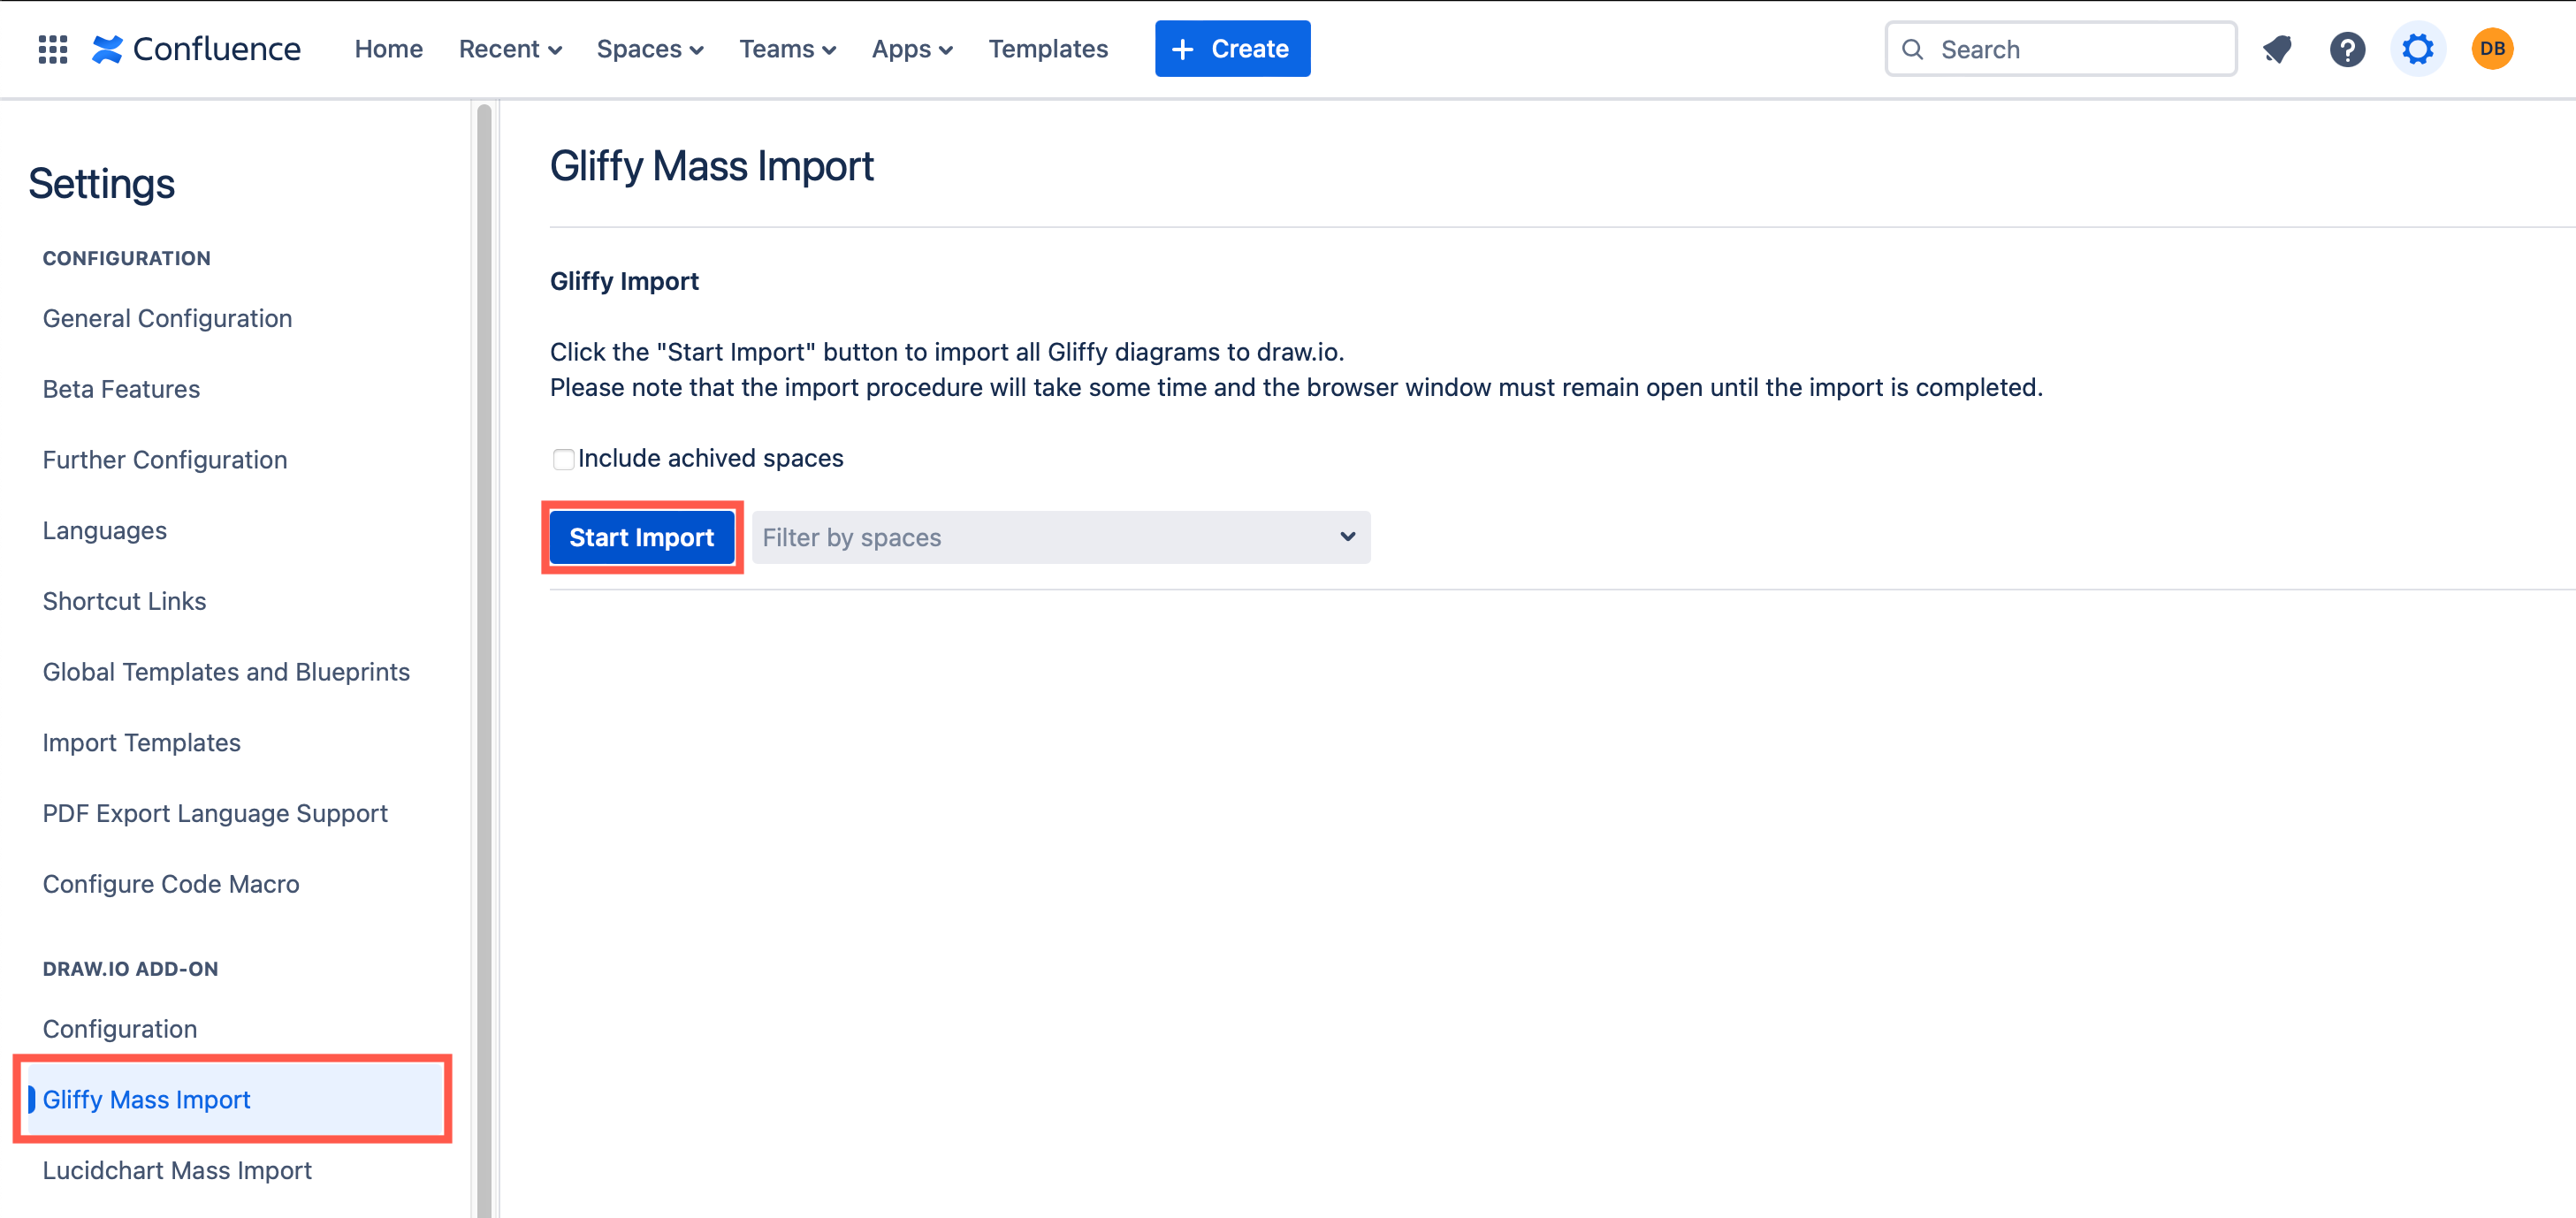
When you add a new diagram to a Confluence page, Gliffy can import a diagram file (Gliffy and VSDX formats). The draw.io diagram importer is currently in alpha testing. Select Import a Diagram when you add a new Gliffy macro, click Choose File, select your diagram file, then click Upload to import it.
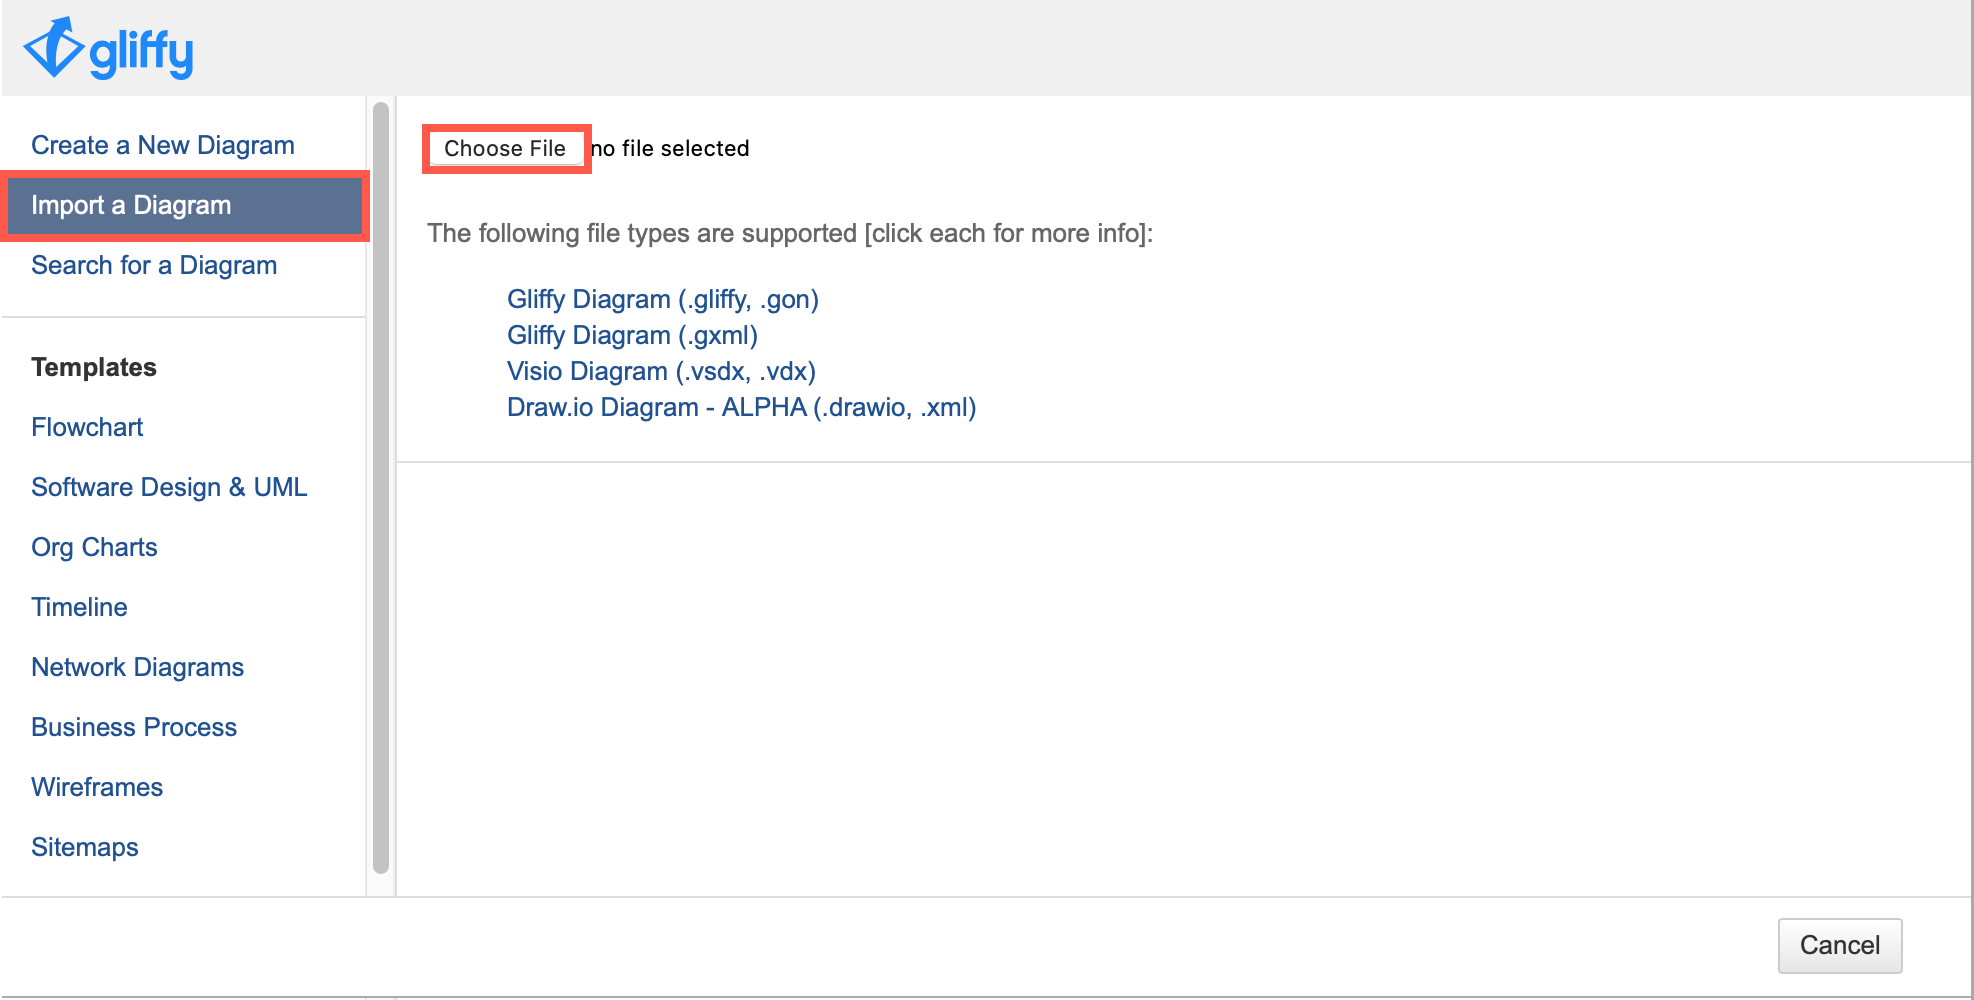
Diagram macro options
The settings for how a diagram macro displays in the Confluence page are in different locations in Gliffy and draw.io.
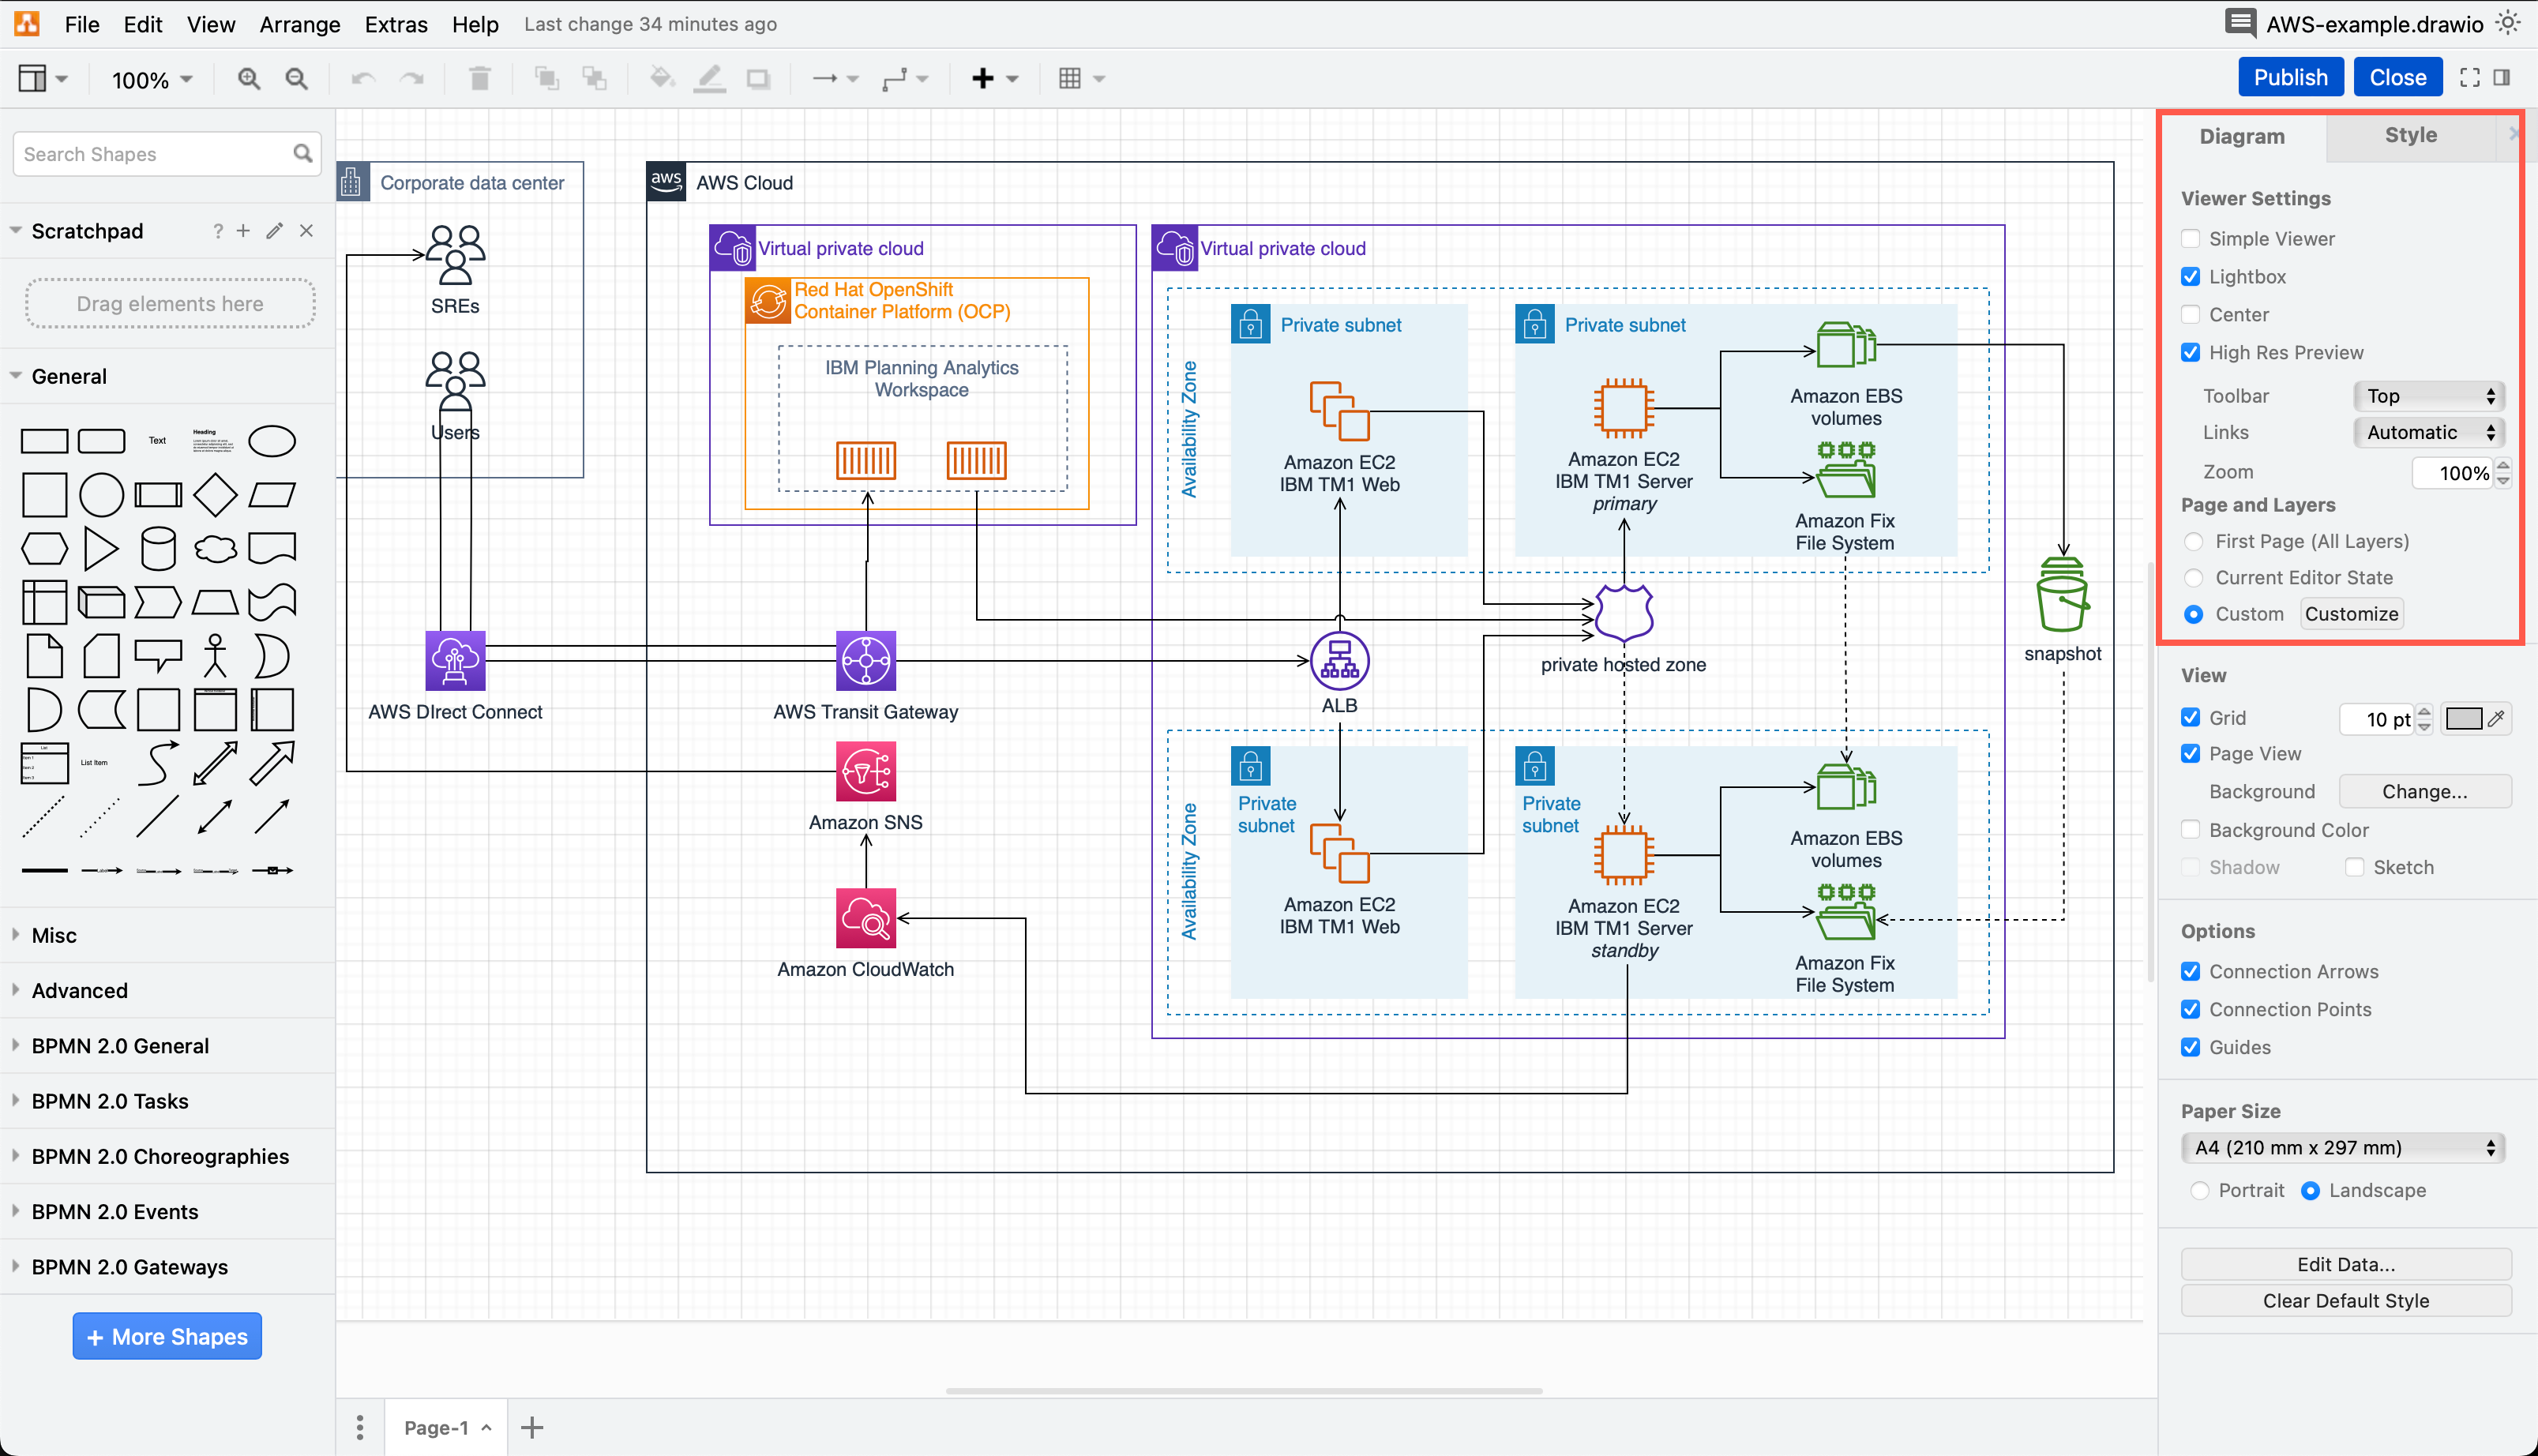
Edit the draw.io diagram, and with nothing selected, change the settings in the Diagram tab of the format panel on the right. You can also select which page and layers you want to display in the Confluence page.
Tip: If you are using the draw.io Board macro, open the Format panel via the menu in the top left.
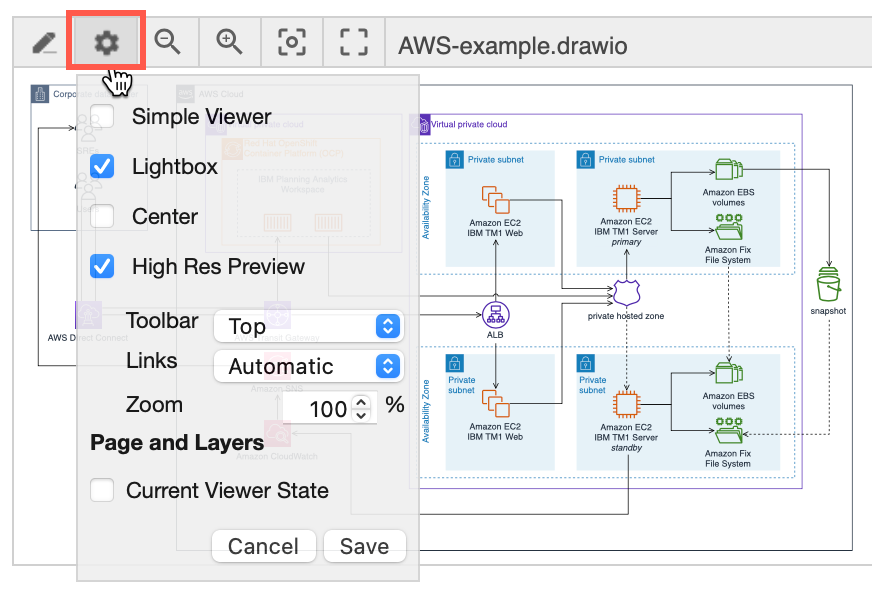
Alternatively, change the diagram and board macro options when viewing the published Confluence page - hover over the diagram and click Viewer Settings, change the settings and click Save.
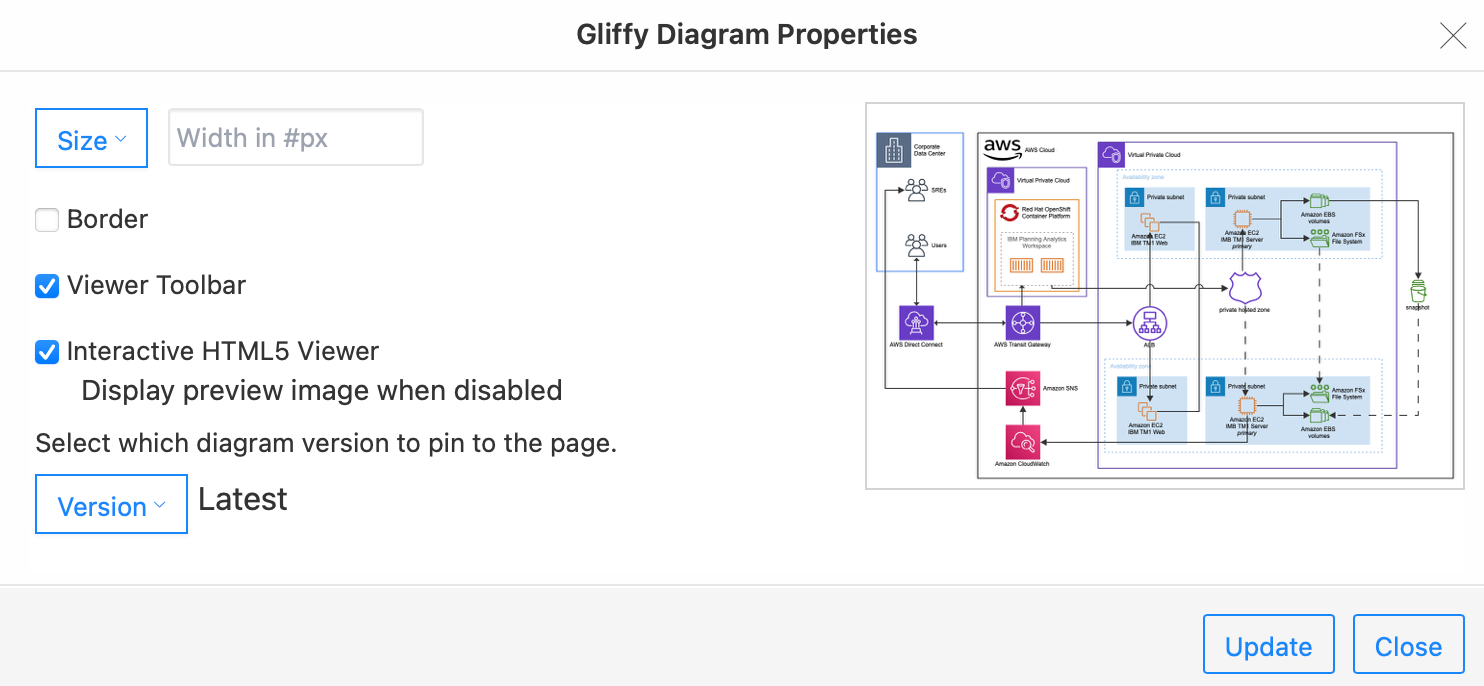
Use the High Res Preview option when your draw.io diagram is smaller on the page to display it neatly, as shown below.
In Gliffy, you can only change the diagram display options from within the editor. Select Properties > Edit Properties to change how the diagram appears in the Confluence page.
Advanced tools available in draw.io
While users will likely not need these functions for most of their diagrams, it is a good idea for them to know what their editor is capable of.
Multi-page diagrams: One draw.io diagram file can contain multiple diagram pages, and you can link diagram pages to shapes so users can interactively step through when viewing the diagram.
Diagrams from text: There are many ways you can generate diagrams from text.
- Use a smart template - type a text description of your diagram in the template library and select the type of diagram you want to generate.
- Write your diagram in PlantUML or Mermaid syntax - Create UML diagrams, flowcharts, mindmaps and org charts from text.
- Generate a diagram from CSV data plus formatting information.
- Draw entities in an ER diagram directly from SQL code.
Math typesetting: You can write math formulae in text labels using LaTeX and AsciiMath.
Custom shape libraries, templates, colour palettes and more: Administrators can customise draw.io to use a corporate style by default, and make assets in a custom shape library or custom diagram templates available to everone.
Users can also create their own custom shape libraries with their most used shapes and diagram segments, export and share them with people they collaborate with to diagram faster.
Searching for diagrams in Confluence: When searching for a draw.io diagram in Confluence, all text inside draw.io diagrams, including labels and even shape names, in addition to the filename of the diagrams will be searched for a match.